
Pull off your helmet after a 90-minute summer run and the experience hits all at once. The blast of damp heat. The sour, earthy smell of sweat that’s been trapped against foam and fabric since the last county line. The smear of bug matter across the chin bar that has baked on like lacquer. You’ve worked hard for that ride — and your helmet has worked harder.
What most riders miss is what’s happening beneath the surface. Human sweat contains lactic acid and sebaceous oils that don’t just smell — they chemically attack EPS (expanded polystyrene), the rigid foam layer inside your helmet engineered to absorb crash energy by compressing in milliseconds. Over repeated rides and inadequate cleans, that liner degrades silently. It still looks fine. It won’t perform fine. Knowing how to clean a motorcycle helmet isn’t a vanity exercise. It’s preventive maintenance on the one piece of gear standing between your skull and the road.
This guide covers everything: the chemistry of what destroys helmets (and what doesn’t), step-by-step interior washing, safe exterior techniques, visor care, drying protocol, and the tools worth buying. Read it once and you’ll never second-guess the process again.

What Soap Is Actually Safe for a Motorcycle Helmet?
The wrong cleaner doesn’t just leave streaks. It attacks the structural integrity of your helmet at a molecular level — which is a sentence that sounds dramatic until you understand the chemistry.
The shell problem: Motorcycle helmet shells made from polycarbonate are composed of long, intertwined polymer chains. Petroleum-based solvents (found in many household cleaners, degreasers, and bug removers) break those chains apart. The result is micro-crazing — a network of hairline stress fractures invisible to the naked eye that dramatically reduce the shell’s ability to absorb and distribute impact energy. A micro-crazed shell looks perfect. In a crash, it doesn’t perform perfectly.
The EPS problem: EPS foam is 98% air, held in a rigid cellular lattice by a polystyrene binder. That air-trap structure is what crushes controllably in a crash, absorbing the kinetic energy your skull doesn’t need. Petroleum-based cleaners dissolve the polystyrene binder, collapsing those cells. EPS liner degradation is almost always invisible from outside the helmet — the foam holds its shape. But squeeze a degraded section and you’ll notice it offers less resistance. That resistance is exactly what you bought when you spent $400 on a quality lid.
The adhesive problem: Alcohol-based products degrade the hot-melt adhesives bonding the EPS liner to the outer shell. Over time, the liner shifts. A liner that shifts during a crash isn’t protecting the right parts of your head.
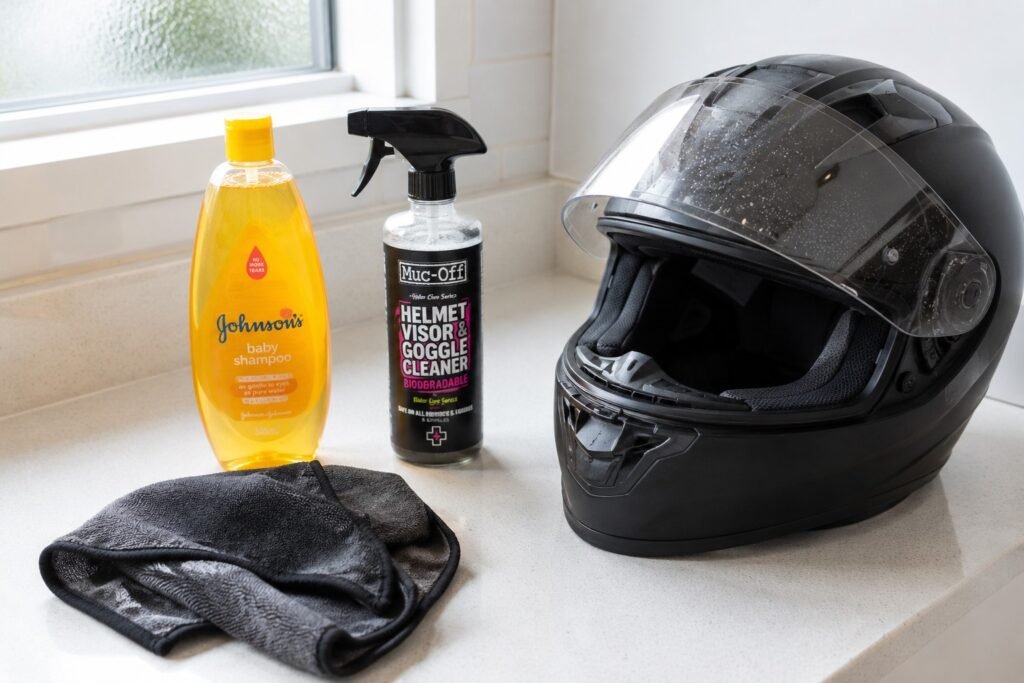
What’s safe: pH-neutral baby shampoo (pH ~7.0) is the benchmark. Its neutrality means it won’t disrupt the chemistry of the foam binder or the moisture-wicking fabric weave. Dedicated helmet interior cleaners with antimicrobial formulations are the other correct answer — look for alcohol-free, fragrance-light formulas that kill odor-causing bacteria at the source rather than masking them.
The hard no-list: Windex (ammonia attacks visor coatings), WD-40 (petroleum-based), Simple Green in many formulations (solvent content varies by product line), bleach, furniture polish, and any citrus-based degreaser. If the label doesn’t say pH-neutral or polymer-safe, assume it isn’t.
How to Wash Motorcycle Helmet Pads Safely (Full Step-by-Step)
Knowing how to clean a motorcycle helmet starts with the interior — because that’s where the biological damage accumulates fastest. Here’s the most thorough process you’ll find.
Before You Start — Disassembly
Most quality helmets from Shoei, Arai, Bell, AGV, HJC, and Schuberth use a snap-or-tab system for cheekpads and crown liners. Before you pull anything out, photograph every pad’s position with your phone. The thirty seconds this takes prevents a twenty-minute reassembly puzzle later, and it signals to your brain that you’re working on precision equipment, not a gym bag.
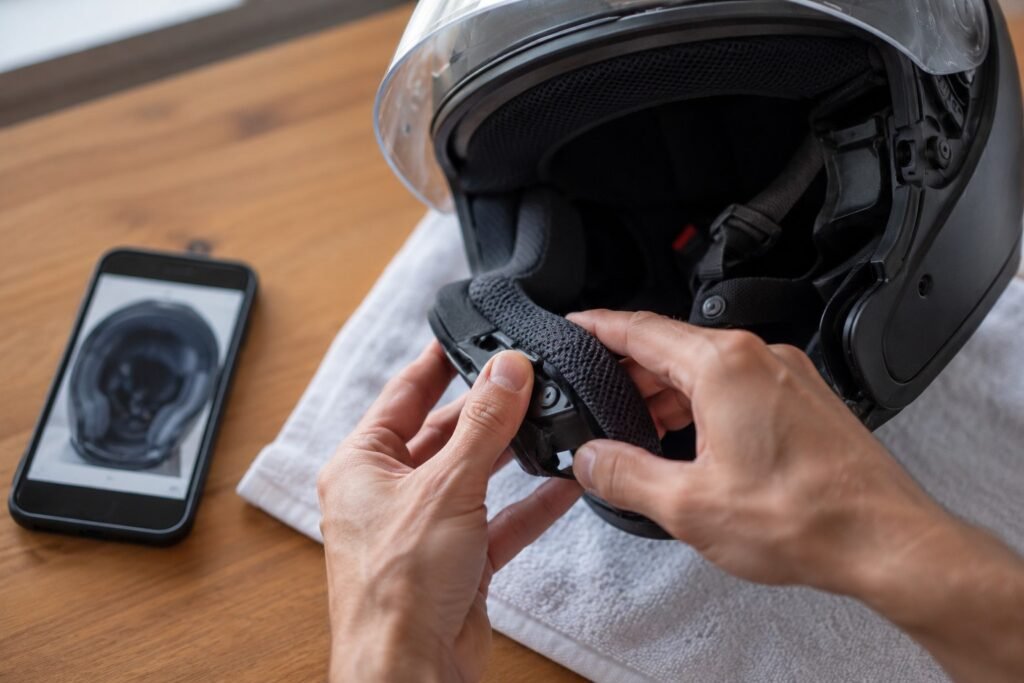
Remove the visor before any wet work if your helmet allows it. Water behind the visor mechanism can work into the ratchet system, causing stiff operation and, in cold climates, freezing. Spend two minutes on disassembly and you’ll thank yourself during reassembly.
Hand-Washing — The Gold Standard
Fill a clean basin with lukewarm water — not hot. Heat above approximately 40°C begins to relax the cellular structure of foam, which means you’re doing the same damage with water that a hairdryer does with air. Add a small amount of pH-neutral baby shampoo or a dedicated helmet liner cleaner and mix gently.
Submerge the liner and cheekpads. Work the solution through the foam and fabric using a kneading motion with your fingers — think of it like working shampoo through thick hair, not scrubbing a pot. The goal is to dislodge sweat residue and bacteria from deep within the textile fibres, not to attack the surface.
Rinse in clean lukewarm water, changing the water as many times as needed until it runs completely clear. Residual soap left in moisture-wicking textiles permanently degrades the capillary action that pulls sweat away from your skin. A rinsed-wrong liner smells fine the first ride back and terrible by the third.
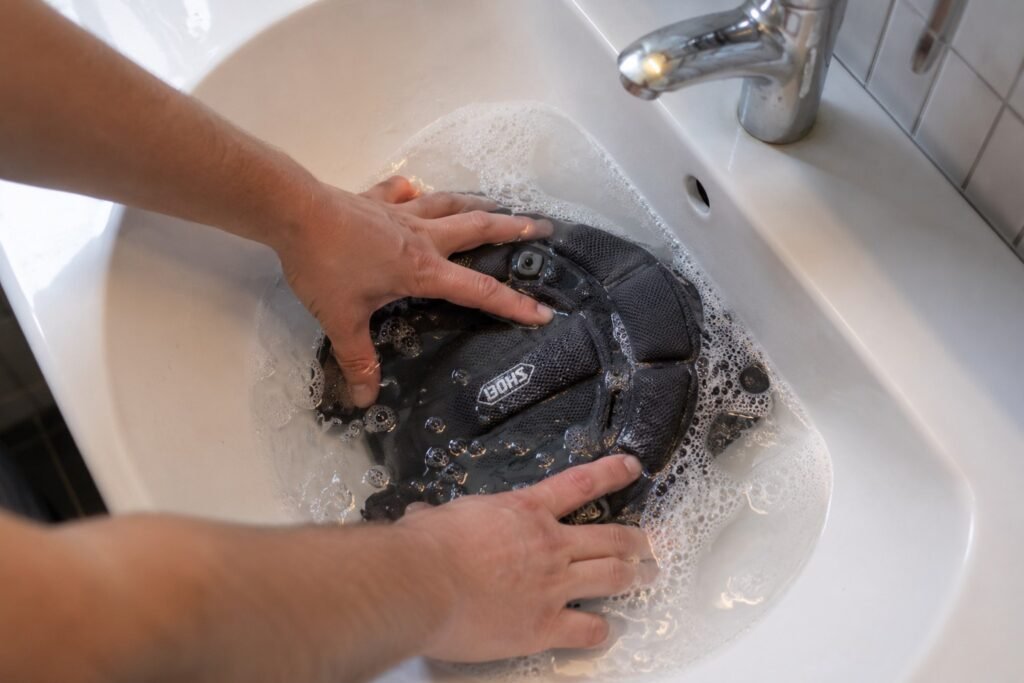
The squeeze technique: This is the step most guides skip when explaining how to clean a motorcycle helmet interior properly. Press pads firmly and flatly between both palms to remove excess water. Never twist, wring, or ball the foam. Twisting tears the internal cell walls — the same microscopic architecture that cushions vibration and determines comfort fit. A twisted-out liner also loses dimensional precision, meaning it fits marginally less well each wash.
Machine Washing — What You Must Know
The question “can you wash helmet liner in washing machine?” deserves a straight answer: technically yes, under strict conditions.
Use a delicate or hand-wash cycle with cold water only. Place pads inside a fine-mesh lingerie laundry bag — this protects snap-tabs from snagging on the drum and prevents the pads from being thrown against the sides. Use a fragrance-free, dye-free detergent and avoid bio/enzyme detergents entirely. Enzyme formulations break down organic proteins aggressively, which sounds useful for sweat removal, but those enzymes don’t discriminate between dead skin cells and foam binders.
Zero fabric softener, ever. Fabric softener deposits a coating on the microfibre strands of moisture-wicking textiles that permanently destroys their ability to transport sweat away from your skin. One wash with softener can reduce liner performance for the life of the pad. Skip the spin cycle if you can — even delicate spin adds mechanical stress to foam that air-drying avoids entirely.
Drying the Interior Pads
Air dry only, at room temperature, away from direct sunlight. Stand pads upright or hang them so air circulates on all sides — stacking wet pads together prevents even drying and encourages mildew. Typical dry time is 12–24 hours depending on pad thickness and ambient humidity.
The importance of how to clean a motorcycle helmet interior properly becomes obvious when you consider what a damp, incompletely dried liner does: it becomes a bacteria incubator, which defeats the entire point of cleaning it. Don’t rush the drying. Don’t reinstall pads that feel dry on the outside but retain core moisture.
How to Clean a Helmet Without Removing the Lining
Some helmets — particularly budget models and older designs — have fixed, non-removable interiors. That’s not a barrier to cleaning properly. It just requires a different approach.
The Submersion Method
Fill a bathtub or large basin with lukewarm water and a capful of pH-neutral shampoo. Submerge the helmet fully, interior facing down, and gently agitate the water. Work a soft cloth or your fingers across all interior surfaces. Rinse by pouring successive amounts of clean water through the interior until no suds remain.
One important caveat: never submerge a helmet with integrated electronic components — Bluetooth units, integrated speakers, or wired communication systems. Water and electronics share a well-known incompatibility.
The Targeted Spray Method (Electronics-Safe)
Spray a dedicated antimicrobial helmet interior cleaner onto a microfibre cloth — never spray directly into the helmet, which risks saturation near seams, electronics, or the EPS bond line. Work methodically from the crown pad down through the cheekpads, using firm but not aggressive pressure.
Follow with a second pass using a clean, damp cloth to lift any residue. This two-pass method for how to clean a motorcycle helmet interior without removal is slower than submersion but leaves zero residue and is completely safe for helmets with electronics.
Tackling the Exterior — Shell, Chin Bar, and Vents
Safe Way to Get Bugs Off a Motorcycle Helmet
Dead insect matter bonds chemically to painted and clear-coated helmet shells as it dries, forming a bond that’s nearly as strong as the substrate itself. The instinct to wipe it off with a dry cloth is understandable and wrong — you’re dragging abrasive organic material across the clear coat.
The correct method is rehydration before contact. Soak a microfibre cloth in warm water, wring to damp-not-dripping, and drape it over the affected areas. Leave it in place for 8–12 minutes. The moisture works back into the dried organic material, breaking the adhesive bond it formed with the shell. After soaking, bugs wipe free with near-zero pressure and zero scratching.
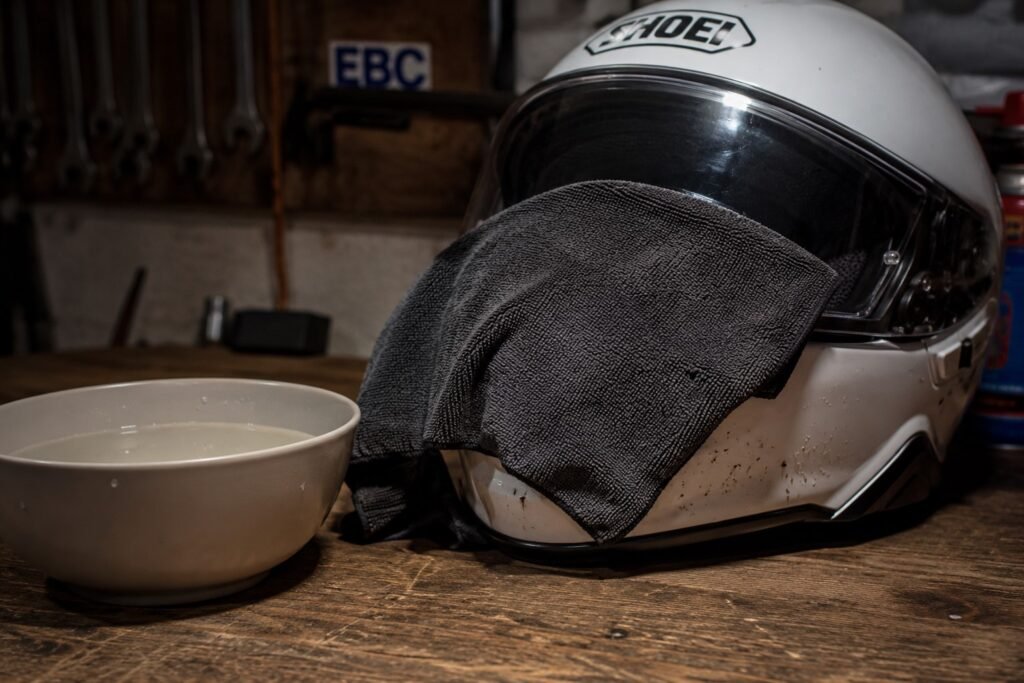
Follow with a pH-neutral cleaning solution on a fresh microfibre, then dry with a third clean cloth. Never use dry paper towels (the cellulose fibres act as fine-grit sandpaper on clear coat), the abrasive side of a kitchen sponge, or petroleum-based bug removers. The last item on that list introduces the same solvent damage discussed in the soap chemistry section above.
Cleaning the Shell — Getting the Gloss Back
Use a dedicated motorcycle spray detailer or a carnauba-based, wax-free polish. Apply with an edgeless microfibre in straight, overlapping strokes — not circular. Circular motion creates micro-swirl marks in the clear coat that catch light at the wrong angle and accumulate over years of cleaning.
One critical distinction for riders with matte-finish helmets: never apply wax to a matte surface. The wax fills the micro-texture that creates the matte appearance and produces uneven sheen patches that are almost impossible to fully reverse.
Achieving a Streak-Free, Safe Visor Clean
A modern helmet visor is not a single piece of plastic. It’s a layered system: a polycarbonate base, an anti-scratch hard coat, an anti-fog treatment layer, UV-blocking compounds, and — on premium visors — a Pinlock sealing groove. Each layer has specific vulnerabilities.
The most common mistake riders make is reaching for a glass cleaner. Ammonia — present in most glass cleaners including Windex — causes polycarbonate to undergo environmental stress cracking, a process where the material becomes progressively more brittle and prone to sudden crazing. The damage is cumulative and mostly invisible until it isn’t. A visor cleaned with ammonia-based products 20 times looks slightly worse each time, then one day hazes catastrophically in a way that can’t be polished out.
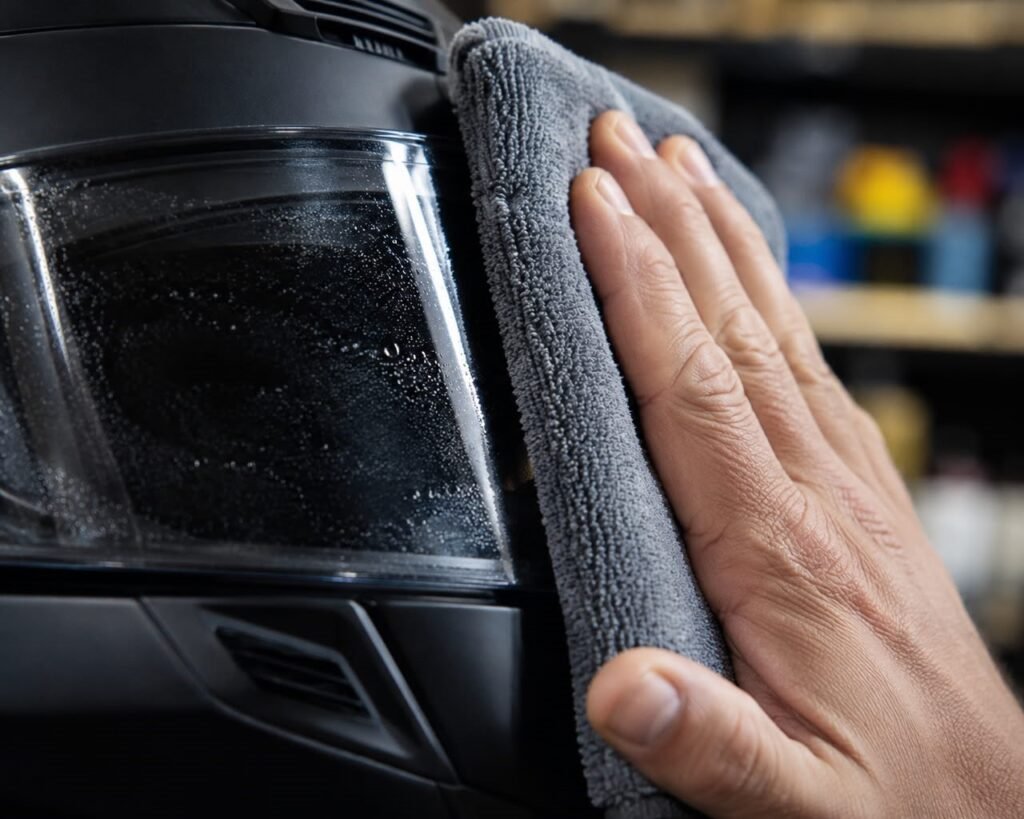
The correct process for how to clean a motorcycle helmet visor begins with rinsing loose debris under cool running water — never wipe a dry visor. Use a dedicated visor cleaner or heavily diluted pH-neutral shampoo. Wipe with a high-GSM (400+) edgeless microfibre in straight, overlapping strokes from top to bottom. Dry with a completely separate, dry microfibre using the same directional stroke.
Pinlock care requires special attention: Remove the Pinlock insert before cleaning the outer visor. Clean the Pinlock lens separately with nothing but a damp, clean microfibre — no cleaning products of any kind. The Pinlock’s dual-layer anti-condensation system is acutely sensitive to detergent residue, which causes streaking that can’t be removed without replacing the insert.
The Drying Protocol — Where Most Riders Go Wrong
This is the step that undoes everything done correctly before it. Get the cleaning right and the drying wrong, and you’ve still degraded your helmet.
Hairdryer: Even on a cool setting above ambient air temperature, forced hot air softens the hot-melt adhesive bonding the EPS liner to the shell. Repeated hairdryer use causes the liner to gradually shift its position. A shifted liner isn’t protecting the geometry of your skull — it’s protecting whatever position it drifted to.
Radiator or heated airer: Same adhesive problem, compounded. Sustained heat exposure causes the EPS bead structure to partially re-expand, altering the density profile that was engineered to absorb impact at a specific rate. A re-expanded EPS liner looks identical to the original and performs measurably worse.
Direct sunlight: UV radiation degrades both the outer shell’s clear coat and the elastic content in interior fabric liners. A sun-dried liner becomes progressively stiffer, less form-fitting, and less comfortable — and comfort fit is part of how a helmet stays in position during a crash.
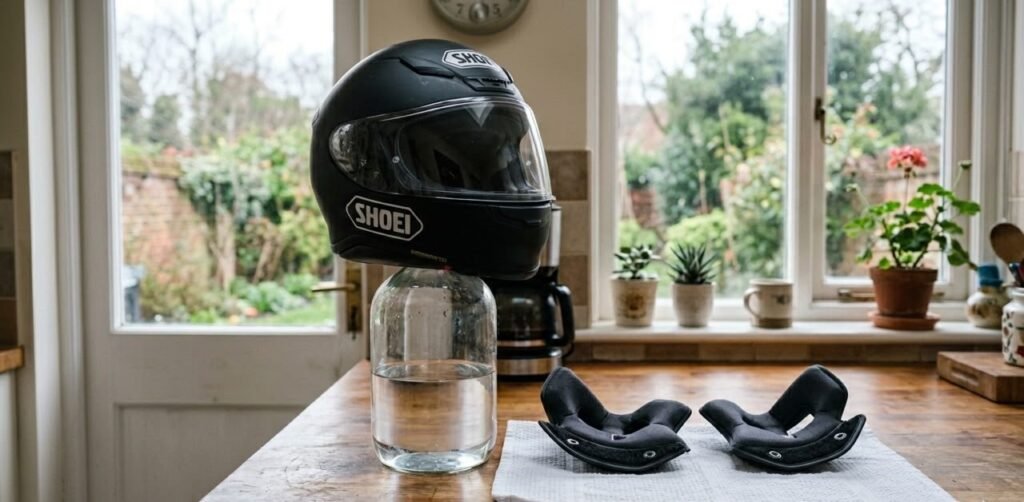
The right method requires no equipment. Room temperature. Passive air circulation. Place the helmet on a stand or invert it over a wide-mouth bottle to allow airflow through the chin bar opening. Interior pads go flat on a clean surface or hang separately. Knowing how to clean a motorcycle helmet correctly means accepting that the drying phase takes 18–24 hours after a full interior wash — and that the job ends only when everything is completely, fully dry before reassembly.
Essential Gear for Helmet Maintenance — Buying Guide
Once you know how to clean a motorcycle helmet properly, having the right tools makes the difference between a 5-minute job and a frustrating one. These aren’t upsells — they’re the difference between protecting a $600 helmet and slowly ruining it.
Dedicated Helmet Interior Cleaners & Sanitizer Sprays
What it does: Cleans, deodorizes, and sanitizes the inner liner without requiring submersion.
What to look for: An antimicrobial formula that kills odor-causing bacteria at the source rather than masking them with fragrance. Quick-dry formulation so you’re not waiting three hours between cleaning and riding. Alcohol-free. Fragrance should be subtle — an aggressively scented spray just creates a new competing smell by the second ride.
Why cheap alternatives fail: Generic fabric refreshers like Febreze mask odor compounds with heavy fragrance molecules that leave residue on moisture-wicking textiles. That residue permanently reduces wicking performance — the very thing that keeps your head dry on long rides.
Premium Edgeless Microfiber Cloths
What it does: The workhorse tool for all exterior cleaning, visor work, and final drying passes.
What to look for: GSM (grams per square meter) of 400 or higher — this indicates a deep pile that captures and lifts dirt particles rather than dragging them across the surface. Edgeless construction means no sewn border that can catch on visor coatings. A 70/30 polyester-to-polyamide ratio delivers the best combination of absorbency and durability.
Why cheap alternatives fail: A sub-200 GSM microfibre is essentially a rebranded paper towel. Its shallow pile traps almost nothing, meaning abrasive debris gets pushed across the surface you’re trying to protect rather than lifted away from it.
Safe Visor Cleaners & Anti-Fog Treatments
What it does: Cleans polycarbonate without chemical damage; anti-fog treatment temporarily fills the micro-pores in visor surface that cause condensation misting.
What to look for: Explicitly ammonia-free and alcohol-free on the label. Anti-fog treatments should state compatibility with factory-coated visors and Pinlock-equipped helmets — generic anti-fog products designed for bathroom mirrors or ski goggles often contain glycerin concentrations too high for polycarbonate, leaving a greasy film that smears under riding conditions.
Why cheap alternatives fail: The savings on a £4 glass cleaner versus a dedicated visor product will cost you the visor eventually. Environmental stress cracking from repeated ammonia exposure isn’t reversible.
Mesh Laundry Bags for Gear Washing
What it does: Protects helmet pads and liner components from mechanical stress and snagging inside a washing machine drum.
What to look for: Fine mesh construction that prevents snap-tabs from catching on drum perforations. Zippered closure — not snap — for security through the wash cycle. Large enough internal volume to hold pads without compressing them against each other.
Why cheap alternatives fail: Wide-mesh bags let small components escape and sustain drum impact damage. Undersized bags compress the pads, which creates the same internal cell-wall stress that wringing by hand causes. The bag is protecting a $50–$100 liner replacement — buy a good one.
Conclusion
Your helmet is certified safety equipment. It was tested, rated, and approved to protect a specific human head — yours — at specific impact energies. Every ride degrades it fractionally: sweat chemistry attacks the EPS, road grime abrades the shell, UV light works on the clear coat. Proper cleaning doesn’t just keep it presentable. It slows that degradation and preserves the engineered performance you paid for.
The chemistry argument matters: the wrong soap doesn’t just leave residue, it compromises structural integrity invisibly. The drying argument matters: heat destroys the adhesives and the foam, and a helmet that looks perfect after ten hot-air drying sessions may not absorb a crash the way it was designed to. The visor argument matters: ammonia is the silent destroyer of polycarbonate, and the degradation is cumulative, irreversible, and invisible until it isn’t.
The next time someone asks you how to clean a motorcycle helmet, tell them the answer isn’t just “carefully” — it’s knowingly.
Your helmet took a safety oath the day you bought it. The least you can do is hold up your end.