
I still remember the first bike I rode with a proper motorcycle quickshifter. It was a trackday loaner, and I short-shifted into turn one without touching the clutch. The bike didn’t hiccup. It just fired the next gear and kept pulling. That moment changed how I think about drivetrain upgrades, and it’s why I’ve spent years since then testing, installing, and occasionally cursing at quickshifters and clutch setups on everything from budget commuters to full-race superbikes.
This guide is everything I wish someone had told me before I dropped my first paycheck on shift hardware. We’ll cover how the tech actually works, where a motorcycle quickshifter earns its keep, and when a clutch upgrade matters more than any electronic gadget. I’ll also walk you through installation, tuning, and the brands I actually trust in my own shop.
Before we dive in, let’s set expectations. A motorcycle quickshifter isn’t magic, and it won’t fix a worn-out clutch or a sloppy gearbox. However, when it’s paired with healthy hardware underneath, it genuinely transforms how a bike feels on every gear change, both on the street and out on track.
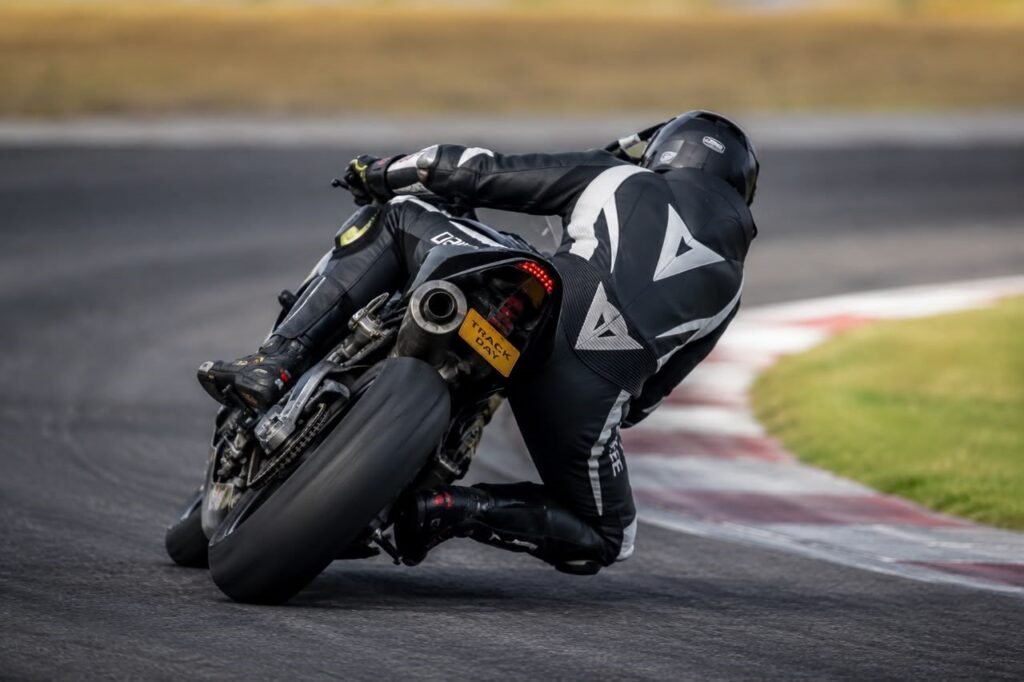
How a Motorcycle Quickshifter Works
A motorcycle quickshifter sounds complicated, but the concept is simple once you see it happen. A sensor detects load on the shift linkage. That signal tells the ECU to cut ignition or fuel for a few milliseconds. During that tiny window, torque drops enough for the transmission dogs to disengage cleanly.
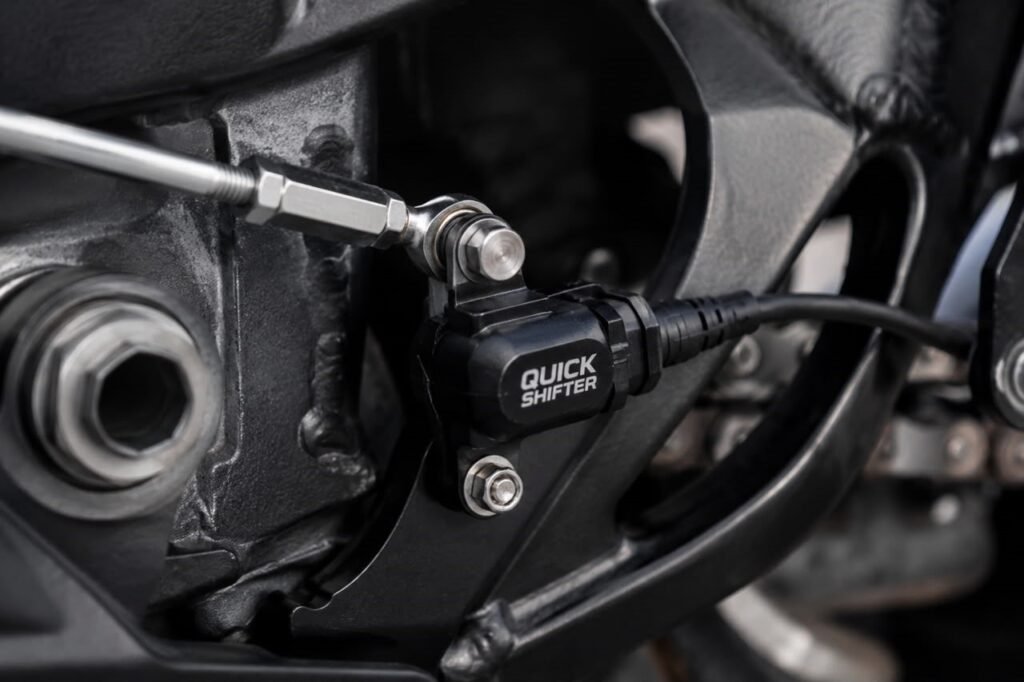
There are two common sensor types. Strain gauges measure the actual force bending the shift rod, which makes them more precise. Linear sensors, on the other hand, detect rod movement rather than force. Both work well, but strain gauges tend to feel smoother because they respond to how hard you’re pushing, not just whether you moved the lever.
Here’s what’s actually happening inside that cut window. The ECU momentarily removes ignition spark, fuel injection, or both. As a result, engine torque drops to near zero for roughly 30 to 60 milliseconds. That’s long enough for the dogs and slots inside a constant-mesh transmission to slide apart and re-engage in the next gear, all without you touching the clutch lever.
I’ve had riders ask me how does a motorcycle quickshifter work without feeling harsh, and the honest answer is calibration. A well-tuned system times that cut so precisely you barely notice torque interruption. A poorly tuned one feels like a hiccup at every gear change.
Some systems cut ignition only, while others cut fuel injection, and a few do both together. Ignition-only cuts tend to feel snappier. Fuel-only cuts are often smoother but slightly slower to respond. Meanwhile, combined cuts give the ECU more precise control, which is why most modern motorcycle quickshifter kits default to that approach on fuel-injected bikes.
I’ve also found that sensor placement changes everything. Mount it too close to the pivot, and it reads inconsistent load. Mount it correctly, and the ECU gets a clean, repeatable signal every single shift. That reliability is what separates a great quickshifter install from a mediocre one.
Upshift-Only vs. Bi-Directional Quickshifters (Auto-Blippers)
Not every quickshifter does the same job. Upshift-only units handle clutchless shifts going up the gearbox, which is where most of the lap-time gain lives anyway. They’re simpler, cheaper, and easier to install on carbureted or older fuel-injected bikes.
Bi-directional quickshifters add downshift support through what’s called an auto blipper. So, what is an auto blipper motorcycle riders keep asking about? It’s a system that briefly blips the throttle electronically during a downshift, matching engine speed to the lower gear so the rear wheel doesn’t lock or hop.
This only works cleanly on throttle-by-wire bikes, since the ECU needs direct control over throttle position. In my experience, bi-directional systems transform aggressive downshifting into something almost effortless. You still brake and downshift like normal, but the bike handles the rev-matching instead of your right wrist.
That said, bi-directional units cost more and demand cleaner calibration. If your bike lacks throttle-by-wire, you’re stuck with upshift-only hardware, and that’s genuinely fine for most street riders.
On trackdays, I lean heavily on the auto blipper during late-braking downshifts into hairpins. Specifically, I’ll grab three gears in quick succession while trail-braking, and the bike matches revs on every single one without any wheel hop. For a street rider commuting through stop-and-go traffic, though, an upshift-only motorcycle quickshifter often delivers most of the everyday benefit at a fraction of the cost.
Quickshifter vs. Slipper Clutch: What’s the Difference?
This is where I see the most confusion, so let’s clear it up. A quickshifter changes how you shift gears. A slipper clutch changes how the engine behaves when you’re decelerating hard. They solve completely different problems.
When you chop the throttle and downshift aggressively, engine braking can overwhelm the rear tire’s grip. That causes chatter or a full rear-wheel hop, which is unsettling mid-corner. A slipper clutch uses ramped cam plates that partially disengage under back-torque, easing that harsh engine braking before it upsets the chassis.
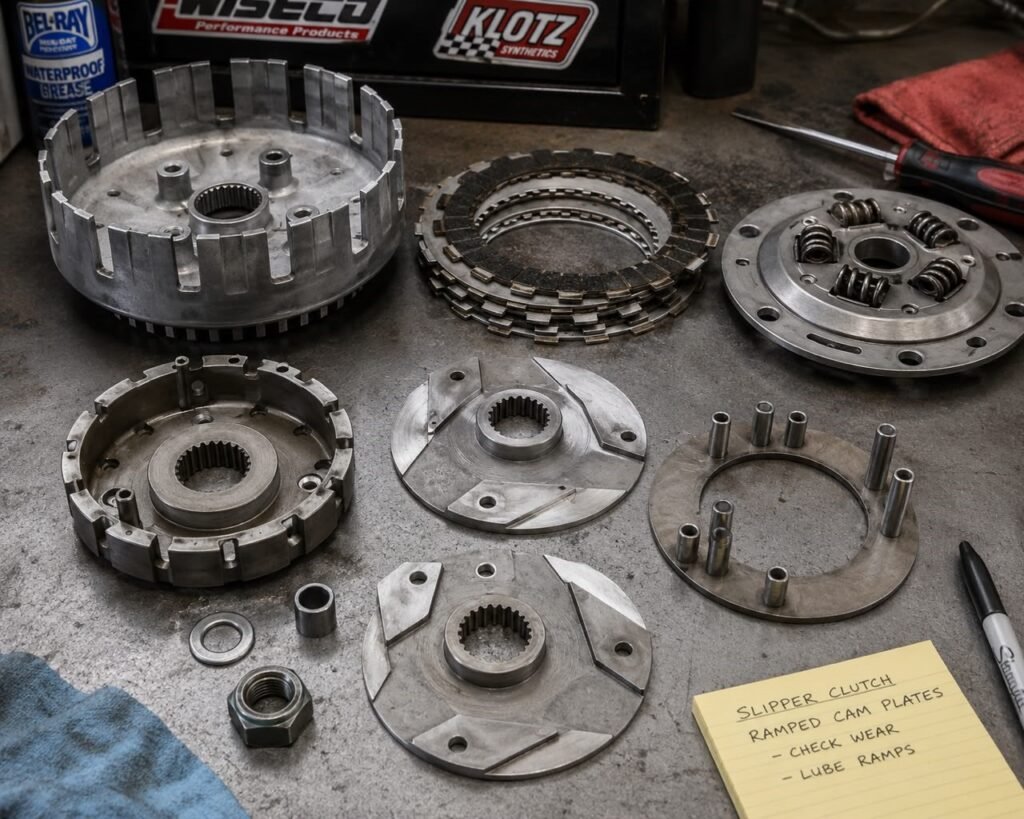
So here’s the quickshifter vs slipper clutch difference in plain terms: one smooths gear changes, the other smooths deceleration. Neither replaces the other. In fact, pairing a motorcycle quickshifter with a slipper clutch gives you the most complete setup I’ve tested — clean upshifts, controlled downshifts, and a chassis that stays settled through corner entry.
I learned this lesson the hard way years ago on a bike with a stock, non-slipper clutch. I’d downshift hard into a tight corner, and the rear wheel would chatter and skip across the pavement. It felt like the bike was fighting me at exactly the moment I needed stability. Once I installed a slipper clutch, that chatter disappeared almost entirely, even under aggressive braking.
Slipper clutches typically use ramped cam faces built into the clutch hub. Under normal acceleration, those ramps stay engaged and transmit full power. Under back-torque, though, the ramps separate slightly, reducing clamping force and letting the clutch slip just enough to absorb that excess engine braking. It’s a purely mechanical solution, and it works whether or not you have any electronics installed at all.
Heavy-Duty Motorcycle Clutch Upgrades for Smoother Shifting
If you’re adding power through exhaust, tuning, or forced induction, your stock clutch may not keep up. A motorcycle clutch upgrade for smoother shifting usually starts with the friction plates and steel plates, since worn or undersized components are the first thing to slip under load.
Upgraded clutch baskets reduce flex and chatter, especially on bikes making well beyond stock horsepower. Heavy-duty springs increase clamping force, which helps the clutch hold torque without slipping during hard acceleration or aggressive quickshifter cuts.
Hydraulic slave cylinder upgrades matter more than people expect. A worn or air-contaminated hydraulic system creates a mushy, inconsistent clutch pull. That inconsistency throws off quickshifter timing, too, because the ECU expects predictable engagement behavior. Fresh fluid and a quality slave cylinder fix more shifting complaints than most riders realize.
I also recommend checking basket and hub wear whenever you’re upgrading friction plates. A worn basket lets the plates rattle under load, which creates that notchy, clunky feeling some riders blame on the clutch lever itself. Swapping in a stiffer aftermarket basket, along with fresh plates, often solves shifting complaints that owners assumed needed a full transmission rebuild.
For riders who’ve added a turbo or supercharger kit, I always push for aftermarket clutch springs rated well above stock output. Otherwise, you’ll feel clutch slip creeping in right when you need power most, usually coming out of a corner or merging onto a highway.
Debunking the Myth: Does a Quickshifter Damage Your Transmission?
I hear this question constantly, so let’s address it directly. Does a quickshifter damage your transmission if it’s set up correctly? In my experience, no. A properly calibrated cut time actually reduces stress on the dogs and shift forks compared to a sloppy manual shift.
Here’s why. A rushed clutch shift without a quickshifter often leaves partial load on the gearbox during engagement, which grinds the dog edges over time. A quickshifter’s ignition or fuel cut removes torque cleanly, letting the dogs slide together with minimal resistance.
Problems only show up with bad calibration. Too short a cut time forces gears together under load, and that’s where premature wear happens. Too long a cut feels sluggish and can actually increase strain as torque snaps back suddenly. Get the kill time right, and clutchless shifting vs quickshifter debates mostly become moot, because a well-tuned system is arguably gentler than most riders’ clutch technique.
Buying Guide & Brand Comparison
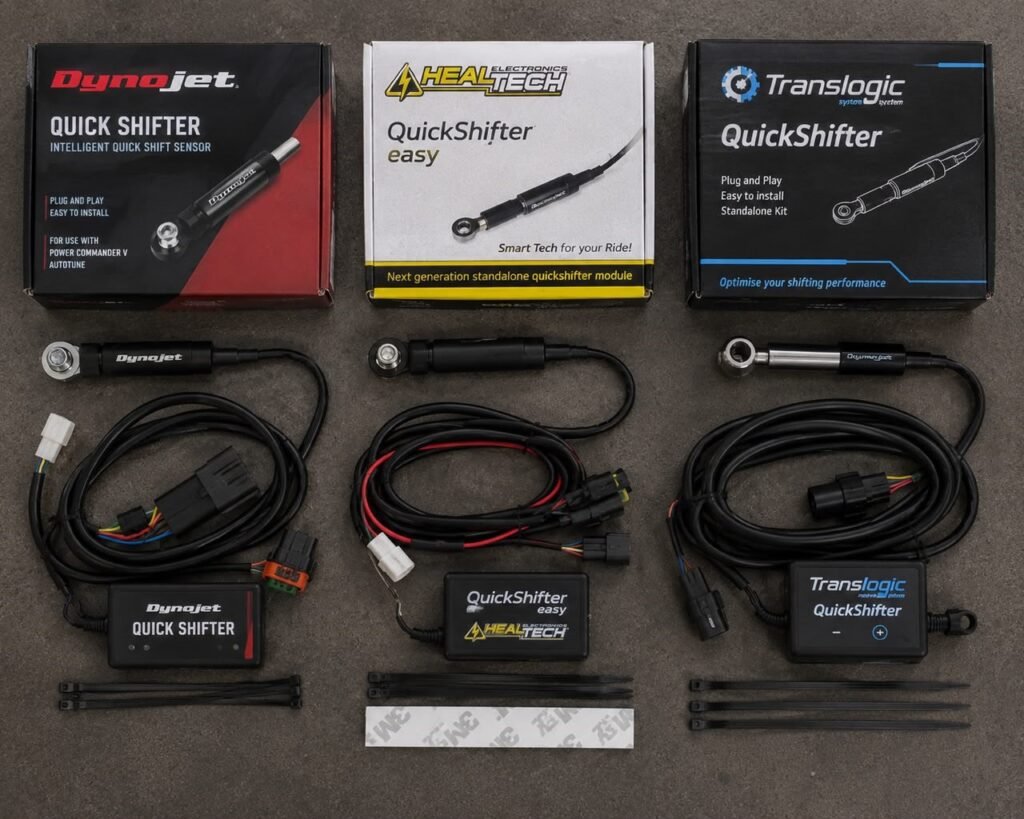
I’ve installed or tested most of the major brands on the market. Here’s how I’d rank them for different riders looking for the best aftermarket quickshifter for sportbikes.
| Brand | Price Range | Key Features | Best For |
|---|---|---|---|
| HealTech iQSE | $160–$280 | Plug-and-play, adjustable cut time, upshift-only or bi-directional versions | Budget-conscious street riders |
| Dynojet Quick Shifter Pro | $280–$450 | Auto-tune calibration, wide bike compatibility, smartphone app tuning | Riders who want quick, guided setup |
| Translogic | $320–$550 | OEM-grade race pedigree, race-proven strain gauge sensor | Track-focused riders wanting proven hardware |
| FTECU | $200–$400 | Full ECU remapping plus quickshifter integration, deep customization | Tuners who want total control |
| OEM Upgrades | $250–$500 | Factory-matched fitment, seamless dash integration | Riders who want a stock-plus feel |
If you’re new to this, I’d point you toward HealTech first. It’s forgiving, well documented, and genuinely reliable. Riders chasing lap times should look at Translogic or Dynojet, since both offer race-tested precision that’s worth the extra cost.
Installation, Setup, and Fine-Tuning Kill Times
Installing a motorcycle quickshifter isn’t difficult, but precision matters. Here’s the process I follow in my own shop.
First, mount the strain gauge or linear sensor to the shift rod, keeping it perfectly in line with rod travel. Any misalignment adds mechanical noise the ECU misreads as shift pressure. Next, set shift rod pre-load according to your kit’s instructions, usually a quarter to half turn of tension.
Wire the sensor into the ECU or standalone controller, then start with the manufacturer’s default kill time. Most kits begin around 40 to 45 milliseconds. From there, I ride the bike gently, testing upshifts at low RPM first before pushing into higher revs.
If shifts feel harsh, extend the cut time slightly. If they feel sluggish or delayed, shorten it. Fine-tuning usually takes a few short rides, and small adjustments make a big difference. This is also the point where clutchless shifting vs quickshifter feel becomes obvious, since a dialed-in system should feel smoother than any manual clutch shift ever could.
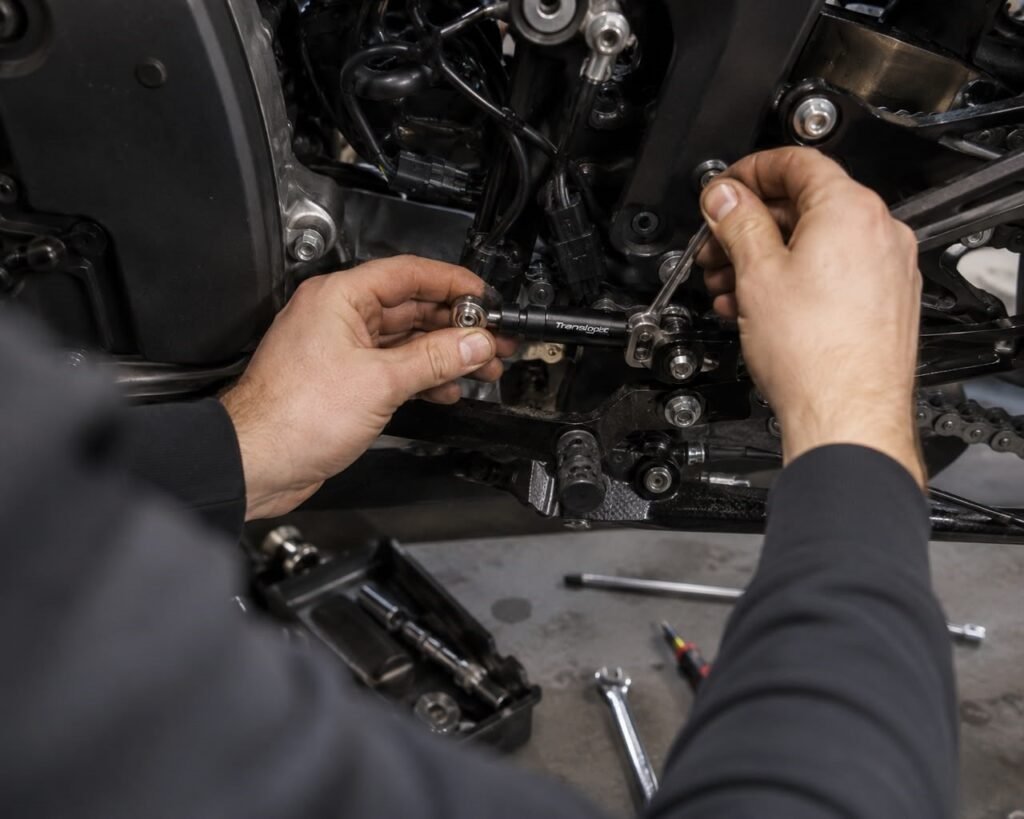
One mistake I see often is riders skipping the low-RPM test phase. It’s tempting to jump straight onto the highway and test full-throttle upshifts. Instead, take it slow at first. Roll through the gears in a parking lot, feel how each shift responds, and only push harder once the calibration feels consistent.
Also, double-check your wiring harness routing before your first ride. Loose connectors near the sensor are a common cause of intermittent shift failures, and they’re easy to miss during a rushed install. A few extra minutes securing cables now saves a frustrating troubleshooting session later.
Conclusion & Final Verdict
After years of installing, breaking, and rebuilding these systems, here’s my honest take. A motorcycle quickshifter is one of the best upgrades you can make for both track performance and everyday street enjoyment. It’s not just about lap times, either. It’s about a drivetrain that feels connected and predictable every time you grab another gear.
That said, don’t stop at electronics. A quickshifter paired with a solid slipper clutch and a properly maintained clutch pack gives you complete control, both accelerating and decelerating. If I were building my own bike today, I’d start with a quality bi-directional motorcycle quickshifter, add a slipper clutch, and finish with fresh friction plates and hydraulic fluid.
That combination, in my experience, is total drivetrain harmony. It’s the setup I’d put on my own bike without a second thought.