
Your Stock Lights Are Getting You Killed — Here’s the Fix
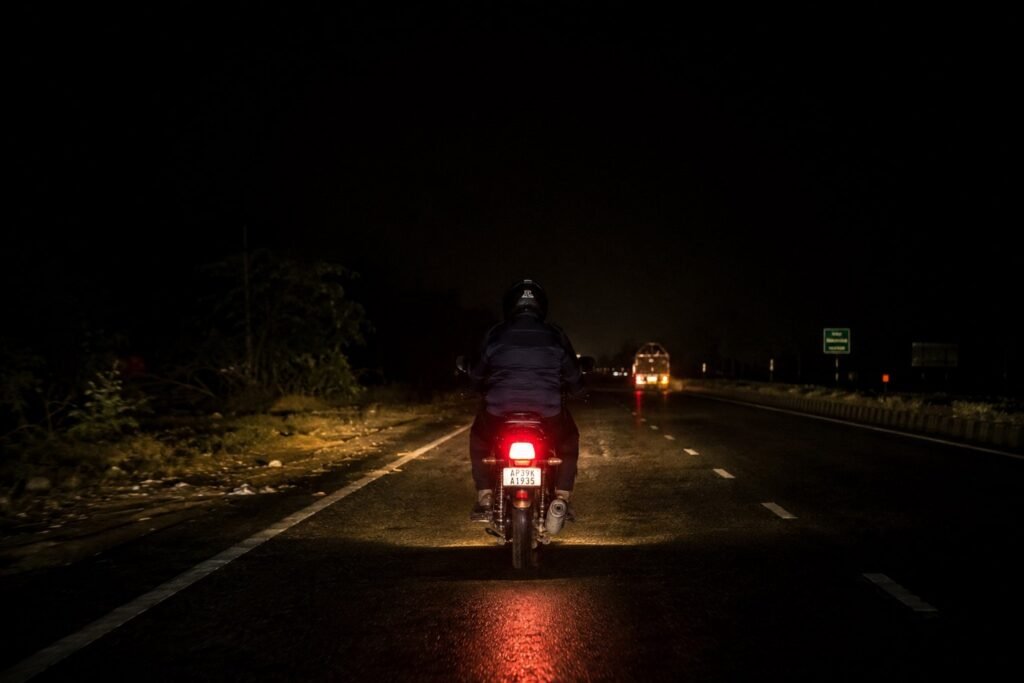
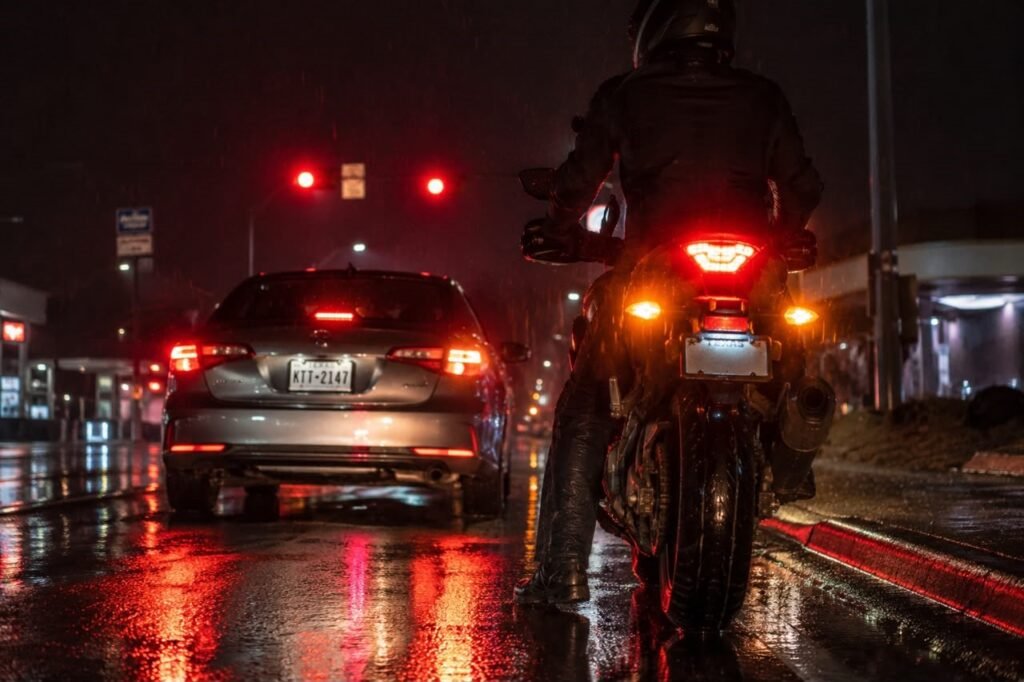
Imagine riding at night on a dark highway. Your headlight throws a weak yellow beam maybe 80 feet ahead. A deer steps out. A pothole opens up. A car drifts into your lane. You don’t have time to react — because you can’t see far enough. That’s exactly the problem budget motorcycle lighting upgrades are designed to solve.
Stock motorcycle lights weren’t built with your safety in mind. They were built to pass the minimum legal requirements at the lowest cost possible. That’s it. They don’t care that you’re riding home at midnight in the rain while cars change lanes without checking their mirrors.
The great news is that budget motorcycle lighting upgrades are better than ever right now. LED technology that used to cost hundreds of dollars has come way down in price. You can make a huge difference in your visibility — both seeing the road ahead and being seen by other drivers — for under $100 per upgrade.
I’ve spent 15+ years working on motorcycles in the shop and riding them on the street. I’ve tested a lot of lighting products. These budget motorcycle lighting upgrades are the real deal, and I’ll show you exactly what to buy, why it works, and how to install it.
Quick Comparison: Four Upgrade Types at a Glance
| Upgrade Type | Lumen Gain vs. Stock | DIY Ease (1–5) | Typical Cost |
|---|---|---|---|
| Drop-In Bulb Swap | +200–900 lm | 5 | $15–$45 |
| Full LED Projector Housing | +1,000–2,500 lm | 3 | $55–$95 |
| Auxiliary LED Pods | +1,500–3,000 lm added | 3 | $25–$80 |
| LED Turn & Brake Signals | Visibility doubled+ | 5 | $20–$60 |
Section 1: The Drop-In Bulb Swap
Why Your Stock Halogen Bulb Isn’t Cutting It
Most bikes built between the late 1990s and mid-2010s came with a halogen bulb — usually an H4, H7, or H11. A stock H4 halogen puts out around 700–900 lumens on high beam. It runs hot, burns more power than it needs to, and produces a yellowish light around 2,700–3,200 Kelvin. That warm glow makes it hard to see road markings, animals, and debris clearly.
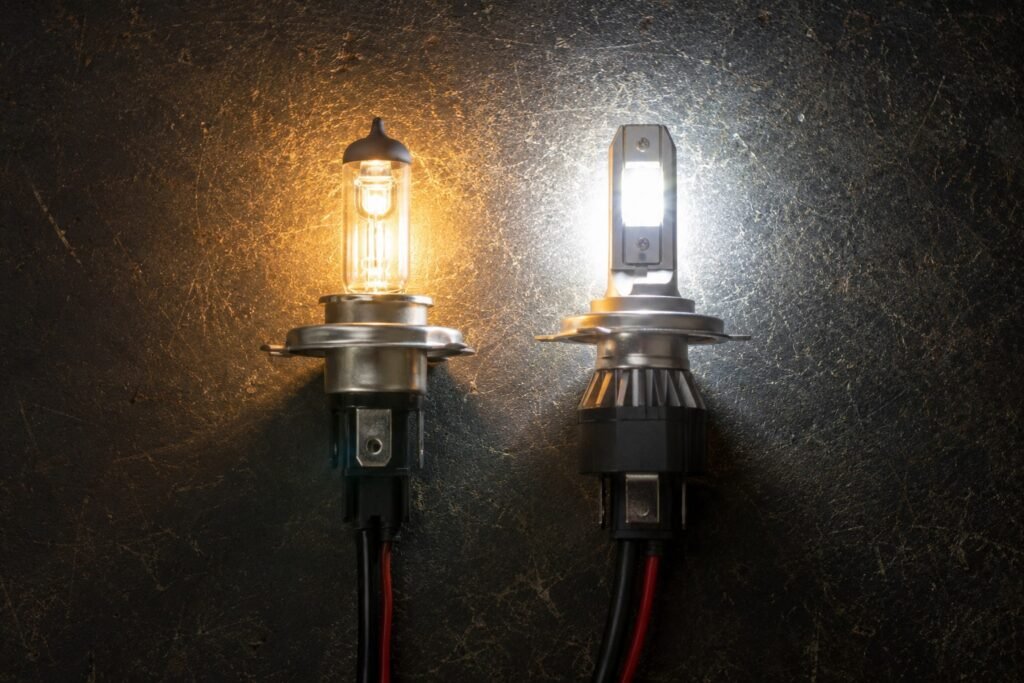
Swap it for an LED and everything changes. One of the best budget motorcycle lighting upgrades you can make is a simple bulb swap — and the Cyclops 10.0 H4 is the gold standard in this category. It puts out 1,600 lumens, runs at 6,000 Kelvin (a clean, bright white light), and draws only 25 watts. Your stock halogen was drawing 55–60 watts. That lower power draw is a real benefit on older bikes with weaker charging systems.
What to Look for in a Drop-In LED Bulb
Always check for an IP67 waterproof rating — that means the bulb can handle being submerged in up to one meter of water for 30 minutes. Anything less, and rain will eventually kill it. Good options include the Cyclops 10.0, the PIAA H4 LED 73222, and the Sylvania SilverStar ZXE H4 (a halogen-xenon hybrid if you want a stepping-stone upgrade).
Pay attention to beam pattern, not just lumen numbers. A bulb throwing 2,000 lumens in a scattered, uncontrolled pattern creates glare for oncoming drivers and doesn’t help you see farther. You want a tight, focused beam with a sharp cutoff line — a clear edge where the light ends and darkness begins. Before you buy, check if the brand publishes beam shot photos. If they don’t show them, skip that brand.
How to Fix Hyper-Flashing After an LED Swap
When you replace turn signal bulbs with LEDs, the bulbs draw less power than the stock halogens did. Your bike’s flasher relay was designed to measure that resistance and flash at a normal rate. With LEDs, it detects low resistance and thinks a bulb is burned out — so it flashes two or three times per second instead of once.
The fix is easy. Replace the thermal flasher relay with an electronic LED-compatible relay (about $8–$12). On most bikes, it’s a direct plug swap — no wiring required. On older bikes without a separate relay, wire a load resistor in parallel across each turn signal to restore proper resistance. The Kuryakyn 4115 load resistor kit costs about $15 and covers both signals.
Section 2: Full LED Projector Housings
When a Bulb Swap Isn’t Enough
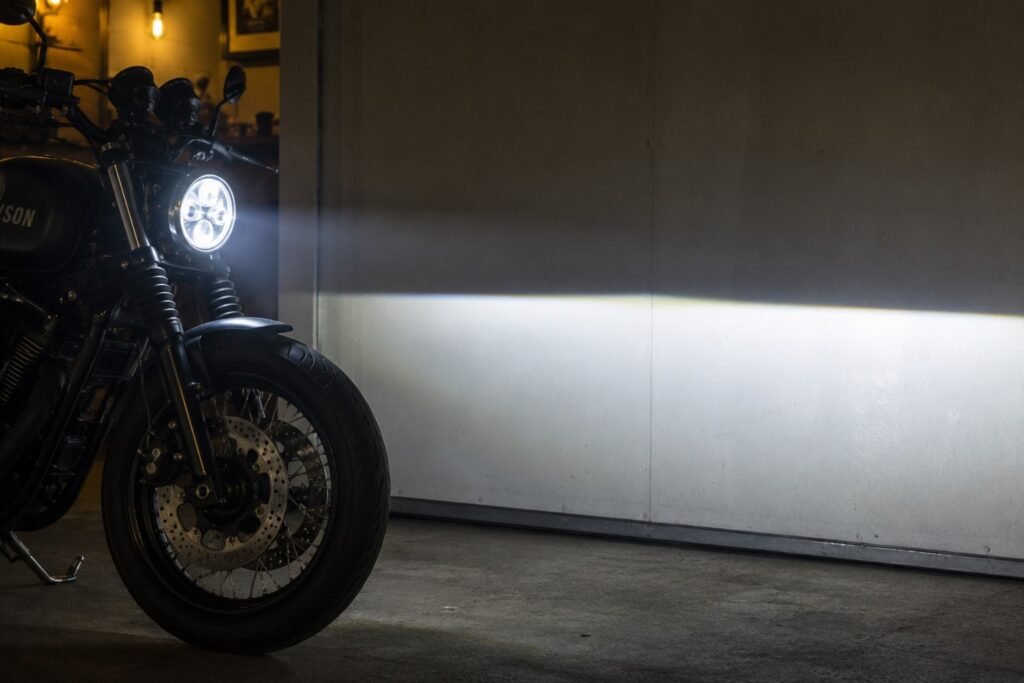
If your bike runs a 7-inch round headlight — common on Harley-Davidson Sportsters, Honda CB series bikes, Kawasaki W800s, and many custom builds — you have access to a completely different level of upgrade. A full LED projector housing replaces the entire headlight assembly, not just the bulb. The new housing is designed from scratch around LED technology, giving you better light control, a sharper beam pattern, and far more brightness.
These are some of the best budget motorcycle lighting upgrades available because the price-to-performance ratio is outstanding.
The TRUE MODS 7″ and GTR Lighting Carbide
The TRUE MODS 7″ LED Headlight is the most popular option in this price range. It puts out 4,500 lumens on high beam, 2,200 on low, has a clean ECE-compliant cutoff line, and draws only 40 watts. It’s IP67 rated. You’ll pay $65–$80 for it, and it’s a direct replacement for your stock 7-inch round housing.
If you want to step up a little, the GTR Lighting Carbide 7″ costs $89–$99 and produces 5,500 lumens through a dual-projector system. Two projectors side by side give you a much wider beam on corners — the outside edge of your lane gets lit up instead of falling into darkness. It runs at 6,500 Kelvin. If you find very cool white light tiring on long night rides, look for a 5,500–6,000K version instead.
How to Aim Your New Headlight Correctly
Getting the aim right matters as much as the upgrade itself. Here’s the simple way to do it. Park your bike on flat ground facing a wall 25 feet away. Sit on the bike in your normal riding position — your weight on the seat compresses the suspension, and that affects where the beam points. The center of the low-beam cutoff line should sit two inches below the center of the headlight on the wall. Most LED housings have a small vertical adjustment screw on the back. Spend five minutes on this step and you’ll avoid blinding oncoming drivers while actually seeing the road ahead.
Section 3: Auxiliary Pods — Seeing Around Corners
The Problem with a Single Headlight
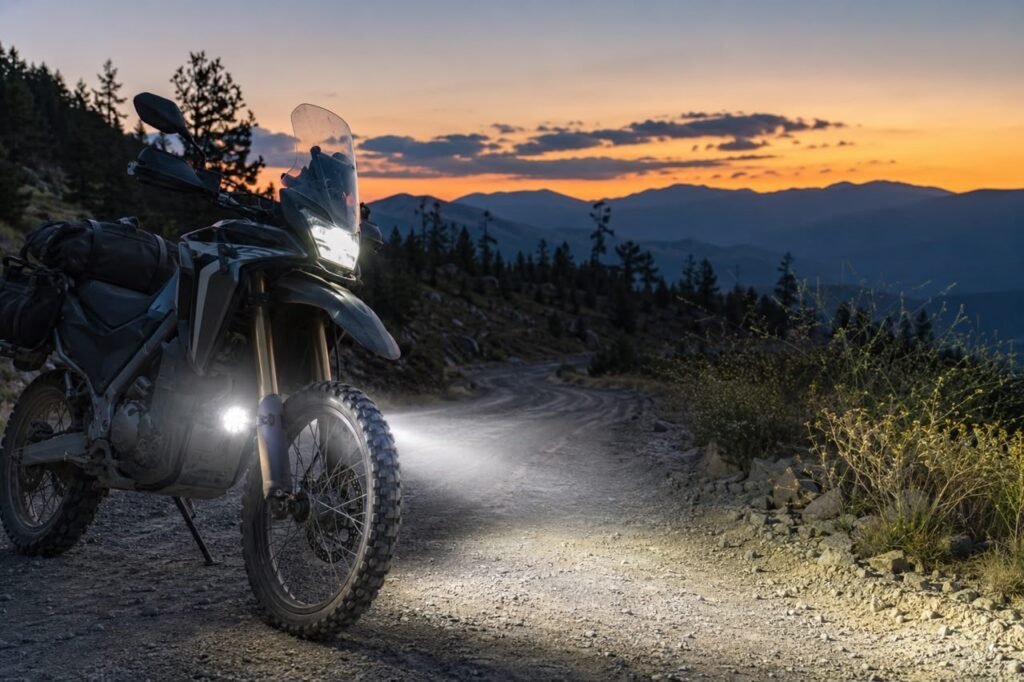
Your main headlight points straight ahead. But danger doesn’t always come from straight ahead. On a winding road, the threat might be 30 degrees off to the side — an animal stepping onto the shoulder, gravel scattered across the outside of a curve, or a car parked just past a blind bend. By the time your headlight beam reaches that area, you’re already in trouble.
Auxiliary LED pods fix this. They mount on your fork legs or crash bars and flood the sides of the road with light before your main beam can reach there. This is one of the most practical budget motorcycle lighting upgrades you can make, and a pair of pods often costs less than $30.
The Best Pods for the Money
The Nilight 3-inch 18W LED pods come in a pair for $25–$30. Each pod puts out 1,260 lumens, uses a wide flood beam pattern for close-range coverage, includes a wiring harness and inline switch, and is IP67 rated. For the price, they’re hard to beat.
Want better build quality? The Rigid Industries Radiance Pod ($85–$95 per pair) outputs 1,500 lumens per pod with a polycarbonate lens that resists rock chips and UV damage. These are built tough enough for off-road racing use. The halo backlight ring also makes the pods visible from behind — a small but useful safety feature.
For dual-sport and adventure riders, the PIAA LP530 LED is worth the $90 for a single pod. It’s SAE and JWL compliant — legal on public roads in most U.S. states — and uses a purpose-built spot beam for long-distance illumination rather than a generic flood pattern. All three options prove that budget motorcycle lighting upgrades don’t mean sacrificing quality or real-world performance.
Wire Your Pods the Right Way
Don’t tap auxiliary pods into your headlight circuit. Your headlight circuit is already handling 25–55 watts, and adding another 18–36 watts can overload your stator on older bikes, especially at low RPM or idle. Instead, wire the pods directly to the battery through a dedicated relay and fuse, switched by the ignition circuit. A basic 30-amp Bosch relay and an inline fuse holder costs under $8 at any auto parts store. This keeps your electrical system healthy and prevents your lights from dimming at stoplights.
Section 4: Rear Lighting — Being Seen from Behind
The Threat You Can’t See
You’ve upgraded your forward lighting. Good. Now think about what’s behind you. How many times have you been stopped at a red light and watched a car slow down in your mirror — and slow down — and stop a little too close? How many times has someone blown through a yellow right behind you in the rain?
Getting hit from behind is one of the most common causes of serious motorcycle injuries. A stronger, brighter rear light setup makes you a much harder target to miss.
LED Turn Signals That Stand Out
Replacing all four turn signals with LEDs is one of the smartest budget motorcycle lighting upgrades on this entire list. Stock incandescent signals output about 200–300 lumens. A quality LED replacement like the Kuryakyn 5450 LED Turn Signal Inserts or the Custom Dynamics ProBEAM Bullets puts out 600–900 lumens with a faster, sharper flash that grabs attention far more effectively.
The Custom Dynamics Smart Triple Play brake/tail/turn combo unit deserves a special mention. It fits a standard 1157 socket, outputs 1,100 lumens at full brake brightness, and uses a sequential flash pattern where the LEDs sweep outward instead of just blinking on and off. Sequential turn signals are more visible in traffic, especially in daylight. Each unit costs $35–$45.
Add a Brake Light Modulator
A brake light modulator pulses your brake light rapidly (about 7–8 times per second) for the first four seconds when you hit the brakes, then settles into a steady light. That initial pulsing motion catches the attention of distracted drivers far better than a static light appearing out of nowhere.
The Custom Dynamics Brake Light Modulator costs $28 and wires inline in about 15 minutes. It’s DOT-compliant and legal in most U.S. states. On a rainy highway with heavy traffic behind you, this device earns its keep every single time you slow down.
Section 5: Installation and Troubleshooting
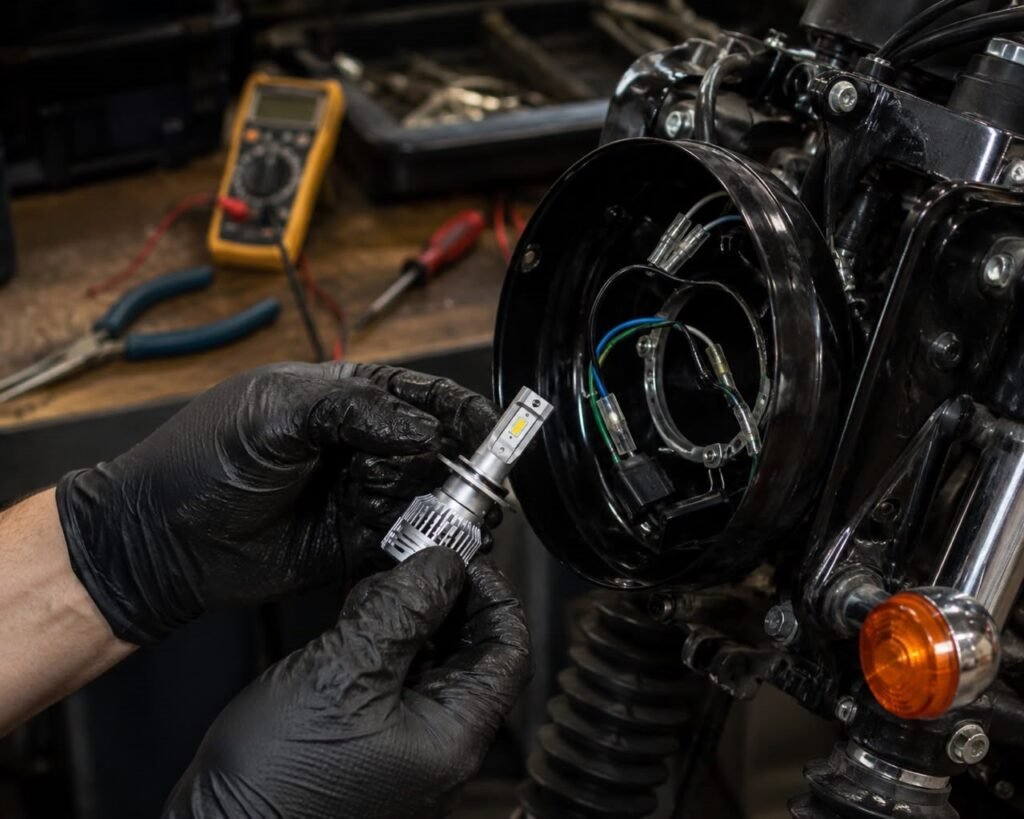
Drop-In Bulb Swap: Step by Step (H4 Example)
- Remove the headlight assembly. Three screws typically hold the bucket in place. Support it so it doesn’t dangle and stress the wiring.
- Disconnect the stock connector. Take note of the tab orientation before pulling it apart.
- Remove the dust boot and retaining clip. The clip releases with light finger pressure — don’t use pliers or you’ll bend it.
- Handle the LED bulb carefully. Don’t touch the chip directly. Keep your hands clean so you don’t corrode the heatsink fins.
- Insert the LED bulb. Align the locating tab — it only fits one way.
- Reassemble in reverse order. Most LED kits include a plug-and-play adapter that connects directly to your stock H4 connector. Reinstall the dust boot if it clears the LED driver module.
- Test before buttoning up. Check low beam, high beam, and verify the beam is pointing level. If it throws light upward instead of forward, rotate the bulb 180 degrees — most H4 LEDs are position-sensitive.
Full 7″ Housing: Same Process, One Extra Step
The steps above apply. The only difference is you’re swapping the entire bucket, not just the bulb. Most 7″ LED housings come with a universal mounting ring that uses the same three-bolt pattern as your stock housing. Plug in the H4 pigtail, secure the ring, and aim the beam as described in Section 2.
Common Problems and How to Fix Them
Light flickers at idle: Low-voltage ripple from your charging system is hitting the LED driver. Add a 9V–24V inline LED filter/capacitor (about $10) between the power lead and the driver. It smooths out the voltage spike and stops the flicker.
One auxiliary pod is brighter than the other: Check your grounds first. LEDs are very sensitive to poor ground connections. Use a star washer under the ground terminal, run the ground wire directly to the frame, and use at least 18-gauge wire.
Turn signals won’t flash after LED swap: If you’ve already replaced the relay, check the ground connection on the signal unit. A loose ground causes a dim, steady glow instead of a proper flash.
Aux pods cause interference with the gauge cluster: The wiring harness may be running too close to ignition coil wires and picking up electrical noise. Wrap the harness in split loom conduit, re-route it away from coil wires, and verify the relay has a solid frame ground.
Frequently Asked Questions
Will LED upgrades drain my battery faster?
No — they actually help your battery. LED headlights use far less power than halogens. A typical H4 LED draws 25 watts compared to 55–60 watts for a halogen. That extra capacity means your battery charges faster at low RPM and your charging system runs cooler. The only exception is if you’re adding auxiliary pods on top of an already weak charging system. In that case, use a dedicated relay and fuse to manage the load properly.
Are these LED upgrades street-legal?
Drop-in LED bulbs exist in a gray area — they’re not SAE-certified in their installed housing, but U.S. law enforcement rarely pursues motorcycle headlight bulb compliance. Full LED housings like the TRUE MODS 7″ and GTR Carbide carry DOT markings and are sold as legal road replacements. For auxiliary pods, most states allow forward-facing white lights mounted below the headlight centerline. Turn signal and brake light LED replacements are DOT-legal as long as they flash between 60 and 120 times per minute — which all quality units do.
How can I tell if a cheap LED is actually IP67 rated?
Look for documentation from third-party testing labs, not just a claim in the product title. Brands like Rigid Industries, PIAA, and Cyclops test to the actual IEC 60529 standard and can back it up. For budget pods from Amazon, scroll through the reviews and look specifically for reports of water intrusion after several months of use. Also check the product photos for a thick, continuous rubber gasket around the lens perimeter. A thin adhesive bead is not a real seal.
What’s the best single budget motorcycle lighting upgrade if I can only pick one?
Upgrade your rear turn signals and add a brake light modulator. Most serious motorcycle crashes involve another driver failing to see the rider — and statistically, that threat comes from behind and from intersections more often than from the front. The Custom Dynamics Smart Triple Play plus a brake light modulator runs under $80 total. It makes you dramatically more visible from 200 feet away, in daylight and in rain. That single upgrade changes your odds in traffic more than almost anything else you could spend $80 on.
Do I need a mechanic for these installs, or can I do it myself?
You can absolutely do all of these yourself. Bulb swaps take a screwdriver and 20 minutes. Full housing replacements take 30–45 minutes. Auxiliary pod wiring is the most involved job — you’ll need to splice wires and install a relay — but most riders can finish it in one to two hours using a basic wiring diagram. If electrical work makes you uncomfortable, a shop will charge about $85–$120 for one hour of labor to wire everything cleanly. Still a great value.
Ride Bright, Ride Seen

Here’s the bottom line. Better lighting doesn’t make you invincible. It gives you time — time to see a hazard before you’re on top of it, and time for another driver to recognize that you exist before they make a move.
Too many riders spend hundreds on cosmetic upgrades and nothing on safety-critical systems. A brake light that flickers because the bulb is half-dead. A headlight that barely reaches the next curve. These aren’t small issues — they’re real risks with real consequences.
You don’t need to spend big. You need to spend on the right things. A drop-in LED bulb for $30. A set of aux pods for $25. LED turn signals and a brake light modulator for under $80. Stack those together and you’ve completely transformed how well you can see at night and how visible you are to everyone around you.
Pick one upgrade this weekend and start there. Once you ride at night with a proper LED headlight for the first time, you’ll understand exactly why these budget motorcycle lighting upgrades matter. Safety isn’t about looking good. It’s about getting home. Ride bright and keep the rubber side down.
Product names, specifications, and pricing are accurate as of the article’s publication date. Always verify current pricing and check your local regulations before installing lighting modifications.