
Why Your Brake Calipers Need Regular Attention
Your brakes are the most important safety system on your motorcycle. Every time you squeeze the lever, your hydraulic system generates enormous clamping force. Yet the entire system depends on rubber seals no wider than a pencil eraser. Road grime, brake dust, and heat cycles above 300°C slowly destroy those seals over time. This is why motorcycle brake caliper maintenance is not optional — it is a safety requirement.
Brake dust builds up inside every gap in the caliper. It oxidises piston surfaces and contaminates slide pin lubricant. Meanwhile, repeated heating and cooling hardens the rubber seals. As a result, the pistons lose their ability to retract cleanly after each stop. Most riders do not notice until brake drag, uneven pad wear, or a fully seized piston appears — often at the worst possible moment.
This guide gives you a complete, technically precise roadmap for inspecting, cleaning, and rebuilding your motorcycle’s brake calipers.
Diagnostics: Why Is My Motorcycle Front Brake Dragging?
Signs of a Seized Motorcycle Brake Caliper
Brake drag is the most common symptom of caliper failure. It feels like your motorcycle is slowing down slightly even with the lever released. However, the root cause depends on your caliper type. Therefore, you must identify your architecture before diagnosing the problem.
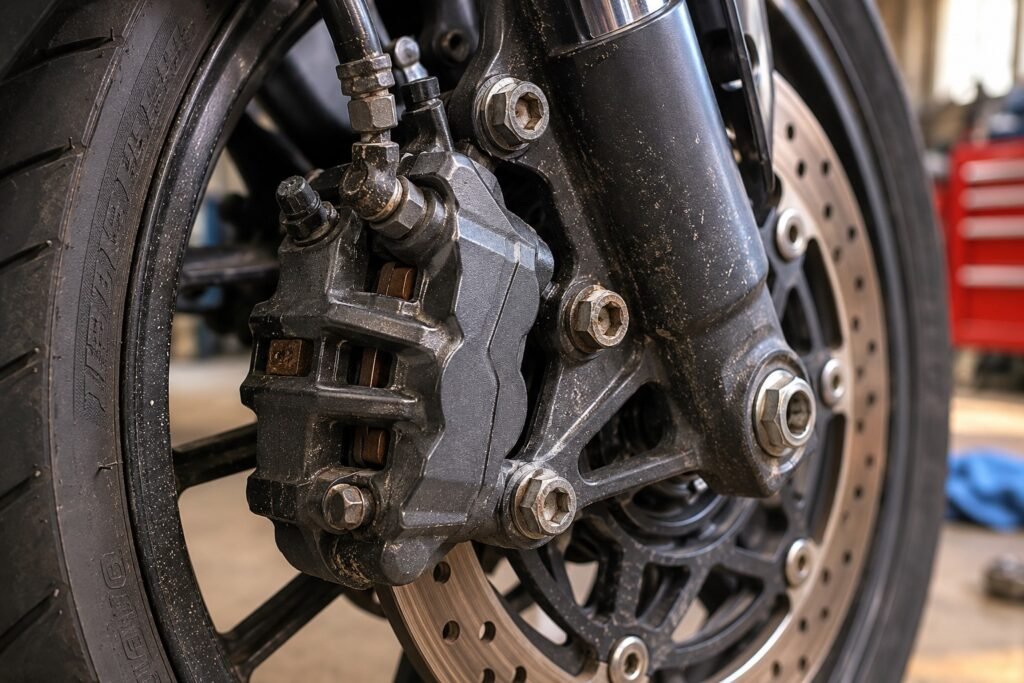
Floating calipers use one or two pistons on the inboard side. The caliper body slides laterally on steel or aluminium pins. Consequently, if a slide pin seizes, the outboard pad stays pressed against the rotor permanently. To test this, push the caliper body sideways by hand with the wheel raised. It should move 3 to 6 mm with little effort. If it resists, you have a seized pin.
Fixed (opposed-piston) calipers mount rigidly to the fork leg. Each piston pushes its own pad directly. A stuck piston here is usually caused by a corroded bore, a swollen dust seal, or a hardened pressure seal. Unlike a float-pin failure, this produces uneven pad wear rather than obvious drag.
Uneven Motorcycle Brake Pad Wear Causes
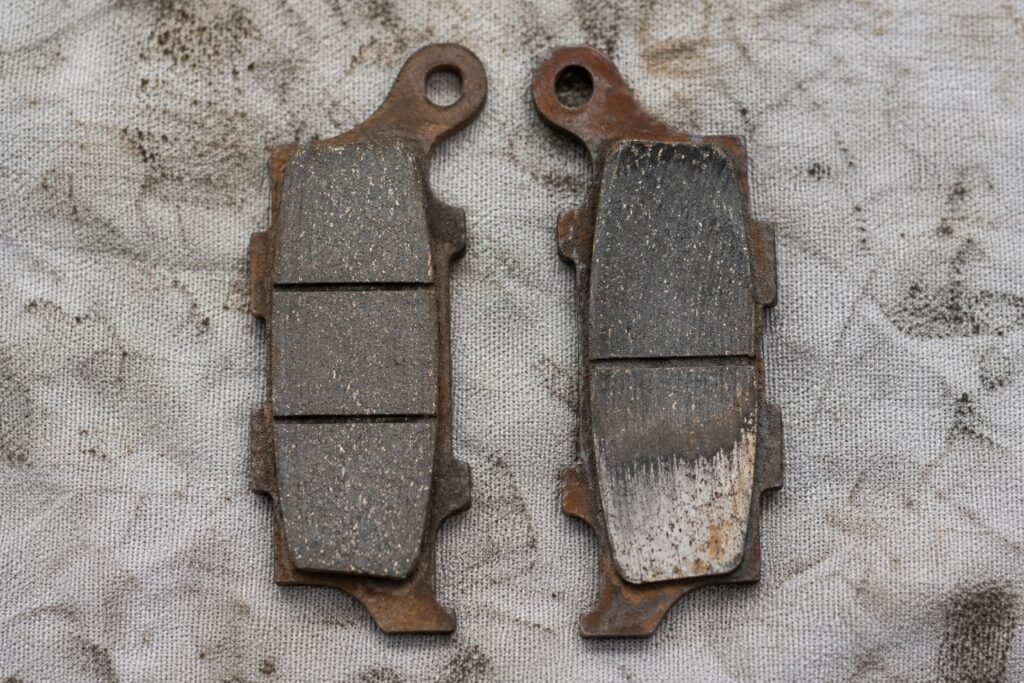
Always inspect your old pads before discarding them. Taper wear — one end thinner than the other — usually points to a seized slide pin. Significant inner-to-outer thickness variance indicates a stuck piston on the thinner side. A worn patch only in the centre suggests a warped rotor. These patterns tell you exactly where to focus your service effort.
Chemical Comparison: Cleaning Motorcycle Brake Calipers with Soapy Water vs. Brake Cleaner
Choosing the wrong cleaning agent causes serious damage. The seals inside your caliper are made from EPDM rubber. EPDM resists glycol-based brake fluid well. However, it absorbs many organic solvents and swells badly as a result.
Chlorinated brake cleaners contain perchloroethylene or methylene chloride. These solvents penetrate EPDM at the molecular level and cause volumetric expansion of up to 30%. A swollen seal then protrudes into the piston bore and grips the piston wall. This is the root cause of a stuck piston appearing days after an apparently successful service.
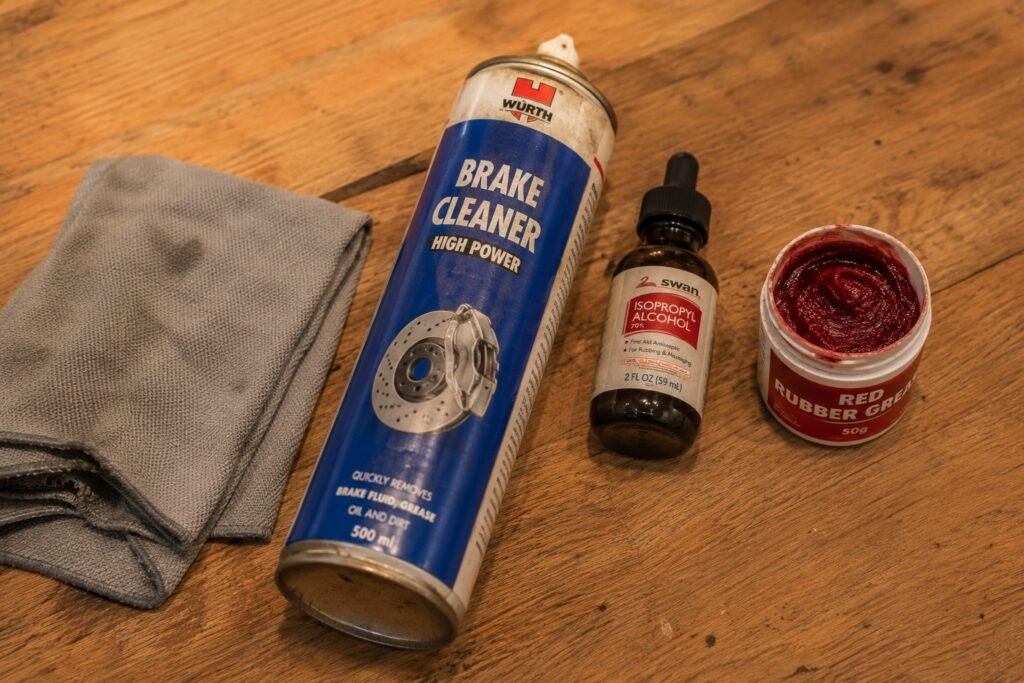
Soapy water, on the other hand, is completely safe for external caliper cleaning and for flushing brake dust from pad channels. Isopropyl alcohol at 91% or higher evaporates cleanly and does not affect EPDM. It is therefore the best choice for wiping piston faces and rotor surfaces. Non-chlorinated brake cleaner is safe for general caliper cleaning when seals remain inside their grooves.
Finally, never allow petroleum-based grease near any rubber component. Its hydrocarbons cause the same swelling as chlorinated solvents — and unlike a spray, grease remains in contact indefinitely. Even a small smear on a piston wall will destroy a new seal within weeks.
How to Clean Brake Caliper Pistons Without Removing Them
A full rebuild is not always necessary. When pistons are lightly contaminated but still move freely, this bench method cleans them in place without disturbing the seals.
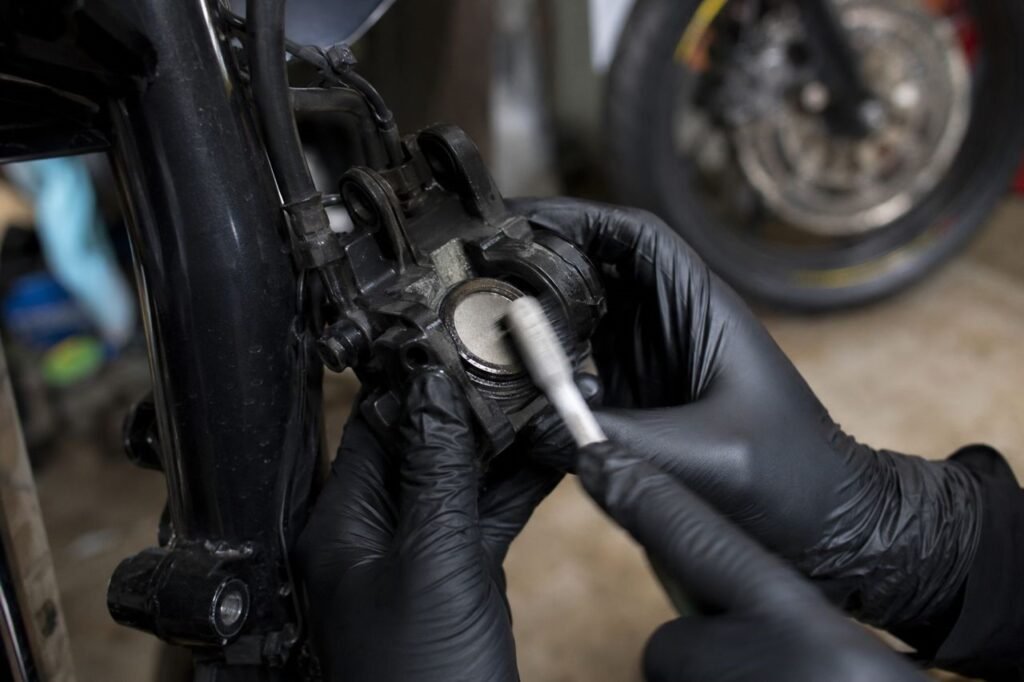
First, remove the brake pads and anti-rattle clip. Apply non-chlorinated brake cleaner to each piston face and allow 30 seconds of dwell time. Then scrub firmly with a nylon-bristle toothbrush in a circular motion. Follow up with a folded cotton cloth using a shoeshine motion to remove the loosened residue. Never use metal wire brushes, as they score the plated surface and create corrosion points.
Next, reinstall the caliper on the fork with a folded rag in place of the pads. This prevents the pistons from ejecting fully. Pump the lever two or three times to extend each piston two to four millimetres. Immediately wipe the newly exposed piston wall with brake cleaner on a lint-free cloth. Then push the piston back in with a flat plastic tyre lever. Repeat this extend-clean-retract cycle three times per piston.
On opposed-piston calipers, clamp the opposing piston with a C-clamp before pumping to isolate one side at a time. Once finished, apply a thin film of fresh brake fluid or red rubber grease to each piston wall below the dust seal before refitting the pads.
Motorcycle Brake Caliper Rebuild Step by Step
When bench cleaning fails, or when the caliper is leaking, a complete rebuild is required. The following motorcycle brake caliper rebuild step by step procedure covers both floating and fixed caliper designs.
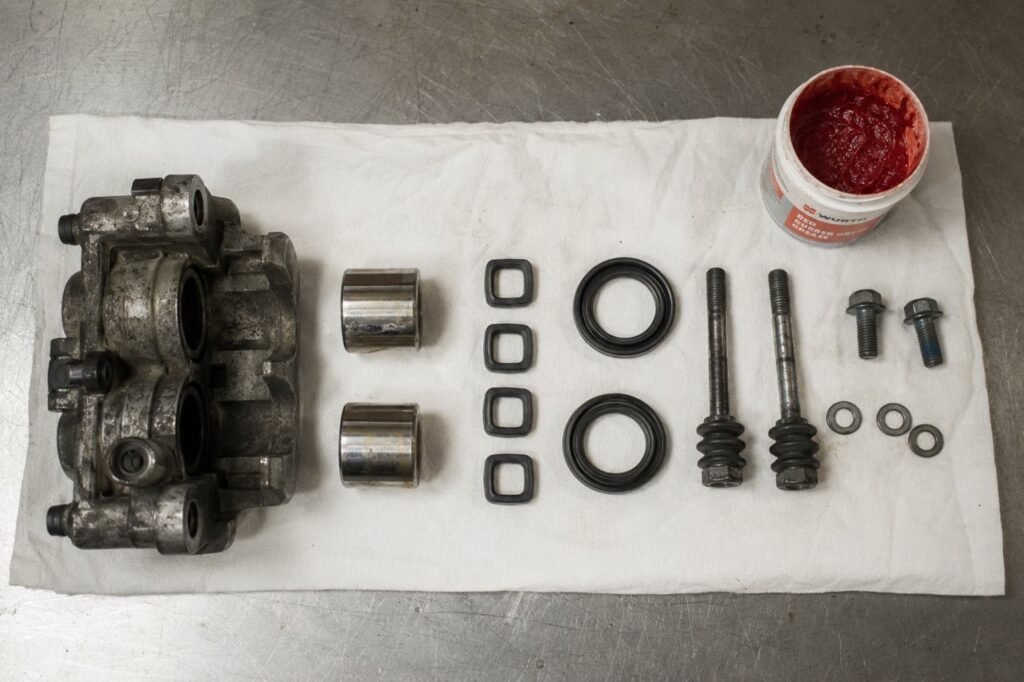
Tools and Consumables Required
- Torque wrench (2 to 25 Nm range)
- Compressed air with a regulated blow-gun (maximum 30 psi)
- Plastic or brass seal pick — never use steel
- Caliper rebuild kit: pressure seals, dust seals, and new pistons if scored
- Red rubber grease or high-temperature silicone brake grease
- DOT-compatible brake fluid (check your OEM specification)
- Lint-free cloths and nitrile gloves
Step 1 — Remove the Caliper and Drain the Fluid
First, crack the bleed nipple and drain the fluid into a catch bottle. Then disconnect the banjo bolt and plug the hose immediately to prevent contamination. Remove the caliper mounting bolts and secure the caliper in a soft-jaw vice. Note that mounting bolts typically require 28 to 40 Nm on reassembly, depending on your model.
Step 2 — Extract the Pistons
Place a folded shop rag inside the caliper to catch ejecting pistons. For lightly stuck pistons, apply regulated compressed air at 20 to 25 psi to the banjo port in short one-to-two second bursts. The piston will pop free into the rag. On opposed-piston calipers, stuff rags behind opposing pistons first to prevent simultaneous ejection. If air pressure fails, use a specialised internal piston puller tool. This grips the inside of the hollow piston and pulls it out without damaging the bore.
Step 3 — Remove the Seals and Inspect the Grooves
Use a plastic seal pick to remove both the dust seal and the square-cut pressure seal. The dust seal sits in the outer groove and keeps contamination out. The pressure seal sits in the inner groove and performs a critical function called roll-back.
When hydraulic pressure pushes the piston out, the square-cut seal distorts elastically in the direction of travel. When pressure drops, the seal returns to its original shape and pulls the piston back by approximately 0.15 to 0.3 mm. This tiny retraction prevents brake drag between applications. A hardened or swollen seal cannot perform this action, which leads to chronic dragging that no pad adjustment can fix.
When to Replace Motorcycle Brake Caliper Seals
Always replace all seals during any rebuild. They are inexpensive compared to the labour involved. In addition, replace seals immediately if you notice swelling, cracking, surface crazing, loss of square cross-section geometry, or a dark and tacky texture. Also inspect the aluminium seal grooves carefully. Pitting or burring in the groove allows micro-leakage past a new seal and will cause the rebuild to fail early.
Step 4 — Clean and Inspect the Bores and Pistons
Wipe each bore wall with isopropyl alcohol on a lint-free cloth. Inspect under a strong light for scratches, pitting, or oval wear. Minor surface oxidation can be polished away with 1,200-grit wet-and-dry paper on a dowel. However, scoring that catches a fingernail means the caliper needs honing or replacement. Similarly, inspect each piston for plating delamination or circumferential scoring. Even minor pitting will abrade a new seal quickly.
Step 5 — Lubricate and Reassemble
This is the most critical step. Use only rubber-safe lubricants. The best grease for motorcycle brake slider pins and piston walls is red rubber grease, high-temperature silicone brake grease, or fresh DOT brake fluid. All three are chemically inert to EPDM rubber. Red rubber grease is the most practical choice because it stays in place during assembly.
Coat the new square-cut seal lightly with red rubber grease. Press it into the inner groove evenly around the full circumference — no twists or gaps. Install the dust seal in the outer groove. Then apply a film of red rubber grease to the full length of each piston wall. Insert each piston by hand using a slow, steady rotation. It should advance under moderate hand pressure only. Excessive resistance means the piston is misaligned.
Step 6 — Service the Slide Pins (Floating Calipers Only)
Remove each slide pin and clean it with non-chlorinated brake cleaner. Inspect for pitting or grooves. Apply a full, even coat of silicone brake grease or PTFE-based caliper grease to the pin shaft and inside the rubber boot. Ensure the boot seats correctly in its groove. A dislodged boot allows water in and will cause the pin to seize again within months.
Step 7 — Torque and Bleed
Reassemble using a calibrated torque wrench. Standard reference values are: banjo bolt 25 to 30 Nm with a new copper crush washer, caliper mounting bolts 28 to 40 Nm with medium threadlocker, and bleed nipple 7 to 10 Nm. Always verify against your OEM workshop manual.
Bleed the system until the fluid from the nipple is completely bubble-free and the lever feels firm and progressive. Then verify your motorcycle brake caliper maintenance work by holding full lever pressure for 30 seconds and checking every joint for seepage.
How to Fix Sticky Motorcycle Brake Caliper Pistons After Cleaning
Sometimes a piston remains sticky even after a thorough clean. In that case, the problem is usually corrosion inside the aluminium seal groove, not on the piston wall itself. Remove the piston completely. Then use a brass wire brush or 600-grit wet-and-dry paper wrapped around a bamboo skewer to clean the groove walls carefully. Remove all white or grey oxidation without enlarging the groove dimensions. Rinse with isopropyl alcohol, dry thoroughly, and coat with red rubber grease before fitting a new seal.
In severe cases, a hardened steel O-ring groove scraper can restore the sharp 90-degree groove profile. This step is frequently skipped during amateur rebuilds. As a result, a freshly rebuilt caliper shows no improvement over the original condition.
Conclusion and Safety Checklist
Motorcycle brake caliper maintenance should be performed at every pad change as a minimum. Additionally, carry out a full rebuild every two years or 12,000 miles, whichever comes first. Always include a brake fluid flush at each major service, since fluid absorbs moisture over time and corrodes internal components.
By understanding seal roll-back mechanics, the dangers of incorrect lubricants, and the diagnostic information in worn pad profiles, you can perform motorcycle brake caliper maintenance to a professional standard. Always treat this work as safety-critical — because it is.
Pre-Ride Safety Checklist After Any Caliper Service
- Top up the brake fluid reservoir to the MAX line
- Pump the brake lever 20 to 30 times to restore full hydraulic pressure
- Confirm a firm, progressive lever feel with no sponginess
- Inspect all joints for leaks under sustained lever pressure
- Perform a slow 10 km/h test stop in a safe area before riding normally
- Recheck all fastener torques after the first heat cycle
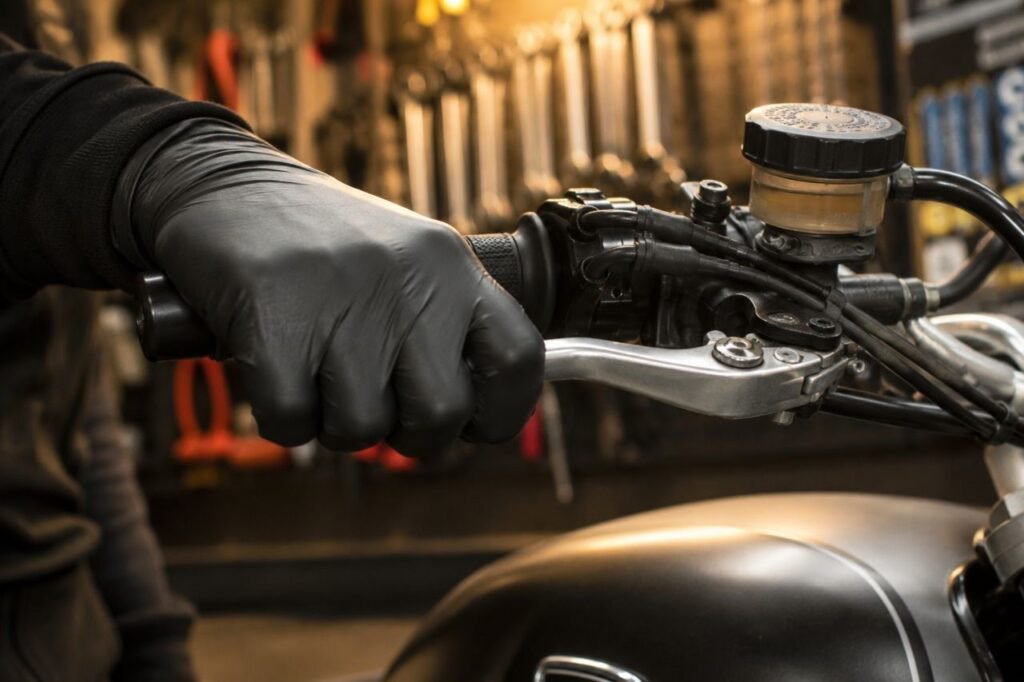
⚠️ SAFETY WARNING: Never ride after any brake service without first pumping the lever until a firm, consistent feel is fully restored. A caliper with air in the hydraulic circuit produces zero braking force at the first application. This is a non-negotiable mechanical requirement — not a suggestion.
Good breakdown of the seal grooves and slide pins. One thing I’d be cautious about is treating generic torque ranges as service specs, even when they’re labeled as reference values. Caliper mounting, banjo and bleed-screw torque can vary quite a bit by application, and some manufacturers also specify new hardware or a particular thread treatment.
For brake work I’d always let the exact workshop manual override a general range.