
By Chris Mchenga | Updated May 26, 2026
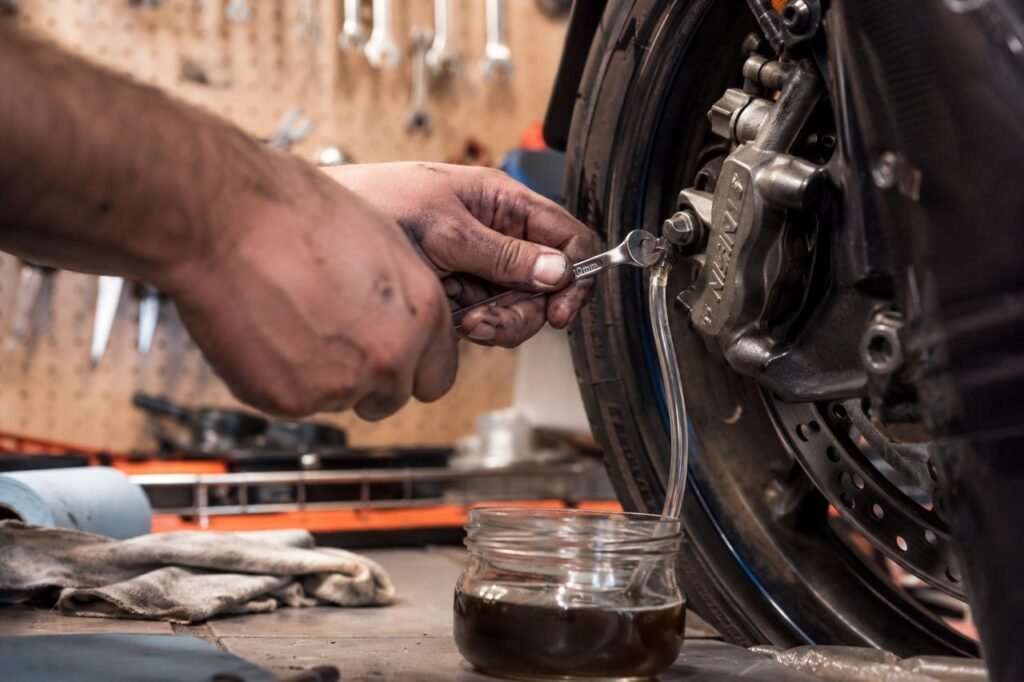
You squeeze the front brake lever and it feels like you’re squeezing a stress ball. Soft. Vague. Slightly terrifying. That spongy feeling is not a quirk — it is physics working against you. Brake fluid is incompressible by design. Air is not. Even a tiny column of trapped air in your brake line compresses under lever pressure instead of transmitting force directly to the caliper piston. The result is a lever that travels too far and delivers too little. Learning how to bleed motorcycle brakes is one of the most valuable skills you can develop as a home mechanic. It costs almost nothing, takes under an hour, and can genuinely save your life.
Section 1: The Cost of Neglect and the Science of Brake Fluid
Why Old Fluid Kills Your Stopping Power
Brake fluid is hygroscopic. That means it actively absorbs moisture from the surrounding air — right through the rubber hoses and reservoir cap seals over time. This is not a flaw; it is intentional chemistry. Engineers designed brake fluid this way so that any absorbed water stays suspended throughout the fluid rather than pooling in one spot and causing localized corrosion inside your caliper or master cylinder.
The problem arrives at high temperatures. Water boils at 212°F (100°C). Your brake calipers on a hard stop can easily hit 300°F to 400°F. When water-contaminated fluid reaches those temperatures, it vaporizes. Gas is compressible. Suddenly, you have a lever that pulses to the bar without doing anything useful — a phenomenon called brake fade through vapor lock. Racers call it “going to the bar.” At the street level, it can mean a T-bone collision.
Fresh fluid keeps your wet boiling point high. Here is what the numbers actually look like:
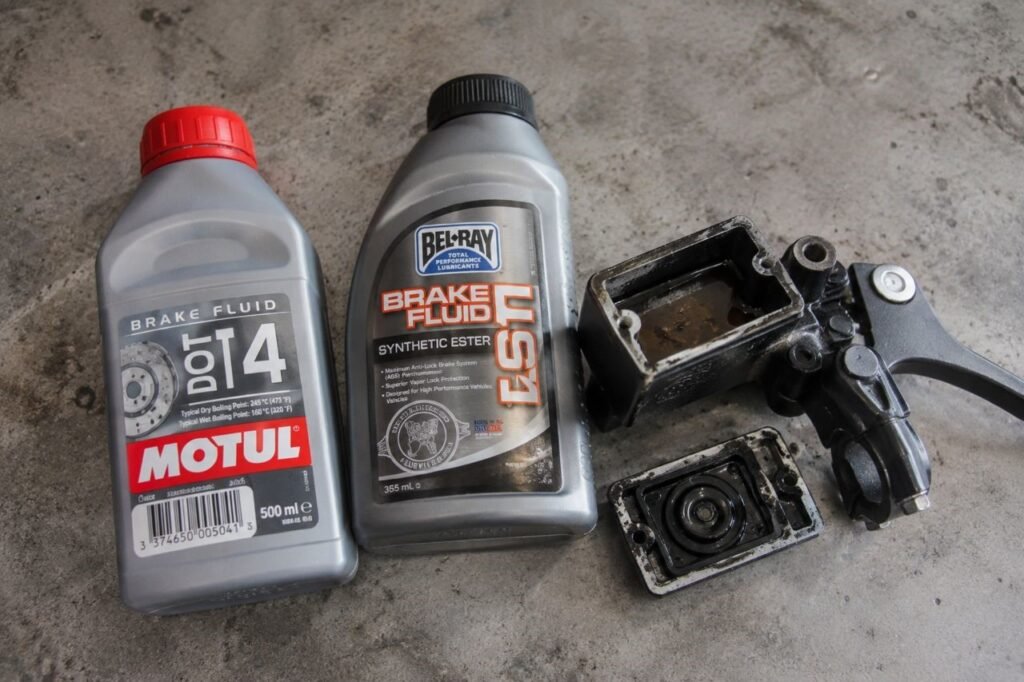
Brake Fluid Boiling Point Comparison
| Fluid Type | Dry Boiling Point | Wet Boiling Point (3.7% water absorbed) |
|---|---|---|
| DOT 3 | 401°F / 205°C | 284°F / 140°C |
| DOT 4 | 446°F / 230°C | 311°F / 155°C |
| DOT 5.1 | 500°F / 260°C | 356°F / 180°C |
Note: DOT 5 (silicone-based, purple in color) is not hygroscopic and is incompatible with DOT 3, 4, or 5.1 systems. Do not mix them. Most modern motorcycles run DOT 4. Check your reservoir cap before buying fluid.
The wet boiling point is the one that matters in the real world. After 18 to 24 months of use, most brake fluid has absorbed enough moisture to drop significantly toward that wet threshold. A DIY motorcycle brake fluid flush is cheap insurance — a 500ml bottle of quality DOT 4 costs around $10 to $15 and covers your entire bike front and rear.
Section 2: Tool Checks and Workshop Setup
What You Actually Need
You do not need a fancy vacuum bleeder or a pressure bleeding kit. Here is the honest list for how to bleed motorcycle brakes alone with gear you likely already own:
- Fresh brake fluid (DOT 4 or as specified on your reservoir cap)
- Clear plastic tubing — 5mm inner diameter, about 12 inches long
- A small glass jar to catch old fluid
- 10mm or 11mm box-end wrench (for the bleed nipple — check your bike)
- Penetrating oil (PB Blaster or equivalent, if the nipple is seized)
- Rags and paper towels — lots of them
- Isopropyl alcohol for cleanup
- Zip ties — you will need these later
- Painter’s tape or plastic wrap
Protecting Your Paint — Non-Negotiable
Brake fluid destroys paint on contact. DOT 4 is essentially a corrosive solvent as far as your tank and bodywork are concerned. Before you crack open the reservoir, tape off or cover every painted surface within 18 inches of your master cylinder. Lay rags over your tank. Keep paper towels and a water bottle nearby. If fluid lands on paint, flood the area immediately with water and wipe clean. Do not let it sit even for 60 seconds.
Set up your bike on a paddock stand or center stand so it sits level. Level is important — especially on the rear — because an angled master cylinder can trap air in the wrong place. Keep your workspace clean and well-lit. Brake work is not the time to improvise in a dark garage.
Section 3: The Definitive Step-by-Step Method
This is the core of how to bleed motorcycle brakes: the Pump, Hold, Crack, Close method. Follow it precisely and it works every time.
Preparing the System
Start at the master cylinder. On the front brake, this is mounted to your handlebar. Remove the two Phillips screws on the reservoir cap and lift it off carefully. You will see a rubber diaphragm underneath — remove this too and set both aside on a clean rag. The fluid inside should be clear to very light yellow. If it looks brown or dark amber, you have been putting this off too long.
Top the reservoir up to the MAX line with fresh fluid. Place a rag around the reservoir to catch any overflow. Now move down to the caliper.
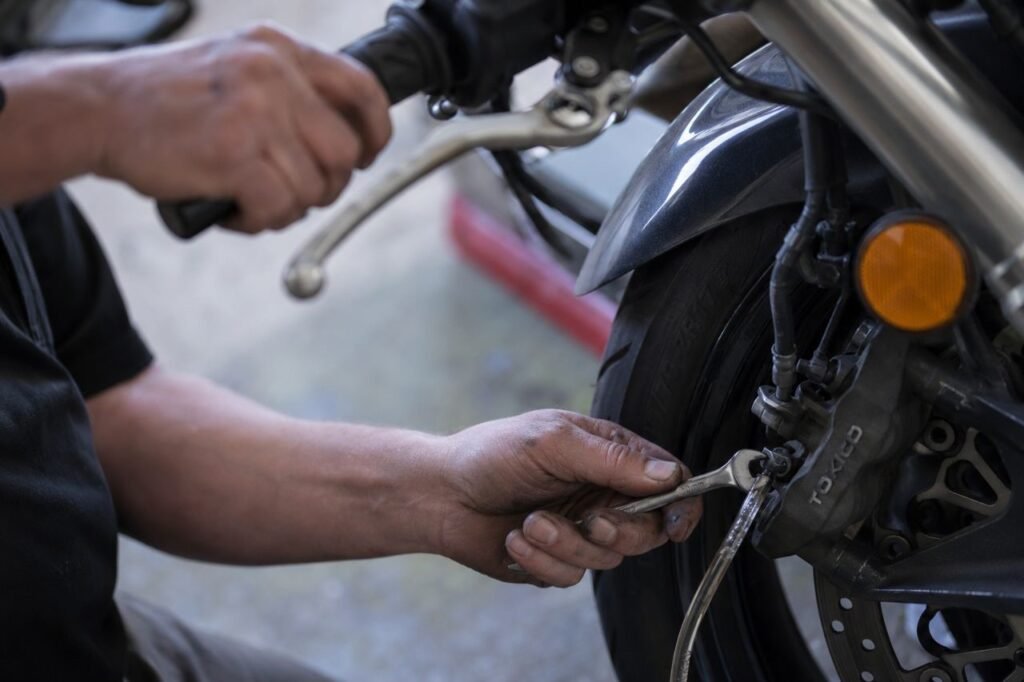
The Pump, Hold, Crack, Close Method
Locate the bleed nipple on your caliper. It is a small hex or tapered fitting — usually 8mm or 10mm — with a rubber dust cap on top. Remove the dust cap and slip your clear plastic tubing over the nipple. Drop the other end of the tube into your glass jar with about an inch of fresh brake fluid already in it. This submerged-tube trick prevents air from being sucked back past the nipple threads during the process.
Now work through these four steps in strict sequence:
1. Pump. Squeeze the brake lever or press the brake pedal slowly three to five times. You are building hydraulic pressure in the system.
2. Hold. On the final pump, hold the lever or pedal firmly against the bar or footrest. Do not release it. Maintain firm, consistent pressure.
3. Crack. With your free hand, loosen the bleed nipple approximately one-quarter turn. You will see fluid and possibly bubbles push through the tube into the jar. The lever will travel toward the bar as pressure releases.
4. Close. Before the lever reaches the bar — or immediately after fluid stops flowing — tighten the bleed nipple. Then release the lever.
Repeat this cycle six to ten times per caliper. Watch the reservoir level constantly. If it runs dry, you pump air directly into the system and extend your work significantly. Top it up every three to four cycles. The fluid coming out of the tube will shift from dark brown to clear golden. When it runs clear with zero bubbles, that circuit is done.
Torque the bleed nipple to 8 Nm (71 in-lbs) when finished — tight enough to seal, but not so tight you shear the nipple. Refit the dust cap.
How to Bleed Rear Motorcycle Brakes
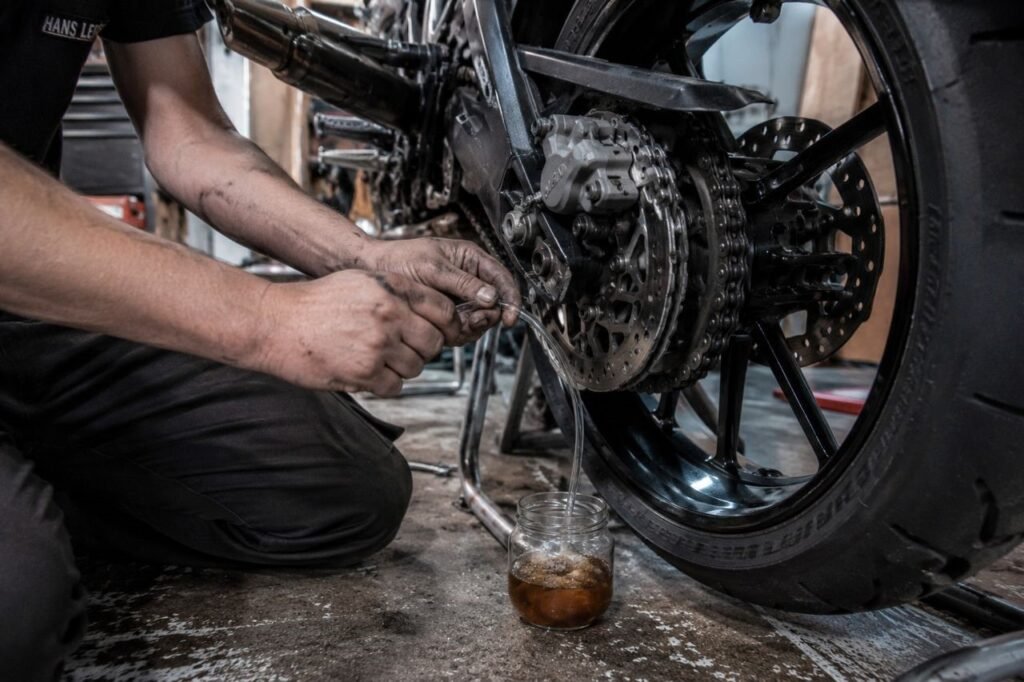
The rear system has a few specific quirks worth understanding. How to bleed rear motorcycle brakes follows the same Pump, Hold, Crack, Close sequence — but the master cylinder is usually mounted low on the frame near the footpeg, and the pedal travel is longer and less precise than a hand lever.
Apply slow, deliberate pressure on the pedal. Stomping it achieves nothing useful. Because the rear master cylinder often sits at an angle or below the caliper level on some designs, air can be stubbornly slow to move in one direction. Work methodically and bleed longer than you think necessary — 12 to 15 cycles is not unusual on a rear that has been neglected.
Watch for two things that differ from the front: first, the rear reservoir is often smaller, so it empties faster. Check it every two cycles. Second, rear calipers sometimes have twin bleed nipples if they run a dual-piston setup. Bleed the lower nipple first, then the upper. Air rises, so finishing at the top nipple clears the last bubbles out.
After finishing, pump the pedal and check that pedal height has returned to its normal, firm position. A solid rear pedal with no sponginess confirms a successful bleed.
Section 4: Advanced Techniques
How to Bleed Motorcycle ABS Brakes at Home
ABS-equipped motorcycles introduce a significant complication. The ABS modulator — a valve block that sits between your master cylinder and your calipers — contains a series of solenoid valves and a small internal pump. These components create multiple small chambers where air can become trapped, completely isolated from the standard bleed circuit.
How to bleed motorcycle ABS brakes at home safely requires one critical step: you must cycle the ABS modulator to move fluid through those internal chambers. On most bikes, you do this by riding slowly and deliberately triggering the ABS (find an empty car park). The modulator pulses its internal valves and pumps, which forces trapped air out into the main brake line where it can then be bled normally.
The sequence is: standard bleed first, then ABS activation cycle, then standard bleed again. Never skip the final bleed pass after the ABS cycle — the modulator pumps can push freed air back into the caliper circuit. Some manufacturers (BMW, KTM, Honda) provide a dealer-only diagnostic tool that cycles the ABS pump electrically without riding. If your bike has a persistent spongy lever that returns after every bleed, the ABS modulator is almost certainly the culprit.
Reverse Bleeding Motorcycle Brakes with a Syringe
For systems with trapped air that the standard method cannot shift, reverse bleeding motorcycle brakes with a syringe is the professional’s secret weapon. Instead of pumping fluid down from the master cylinder, you push fresh fluid upward from the caliper bleed nipple toward the reservoir.
Use a large 60ml syringe and a piece of tubing that fits the bleed nipple snugly. Fill the syringe with fresh brake fluid. Connect it to the open bleed nipple, then slowly and steadily push fluid up through the system. Micro-bubbles — the tiny ones that cling to caliper surfaces and line walls — are buoyant. They want to rise. Pushing fluid upward carries them in the direction of their natural movement, straight into the reservoir where they escape harmlessly.
Keep the reservoir cap off during this process and watch for bubbles surfacing in the fluid. When you see clean, bubble-free fluid rising into the reservoir and no more bubbles appear, close the nipple and perform one final standard bleed pass to equalize the system.
Section 5: Troubleshooting — Winning the War on Sponginess
Why Are My Motorcycle Brakes Still Spongy After Bleeding?
This is the most common frustration in brake work. You followed the steps. You bled the system six times. The lever still feels like it is connected to a sponge. Here is the diagnostic hierarchy.
Why are my motorcycle brakes still spongy after bleeding? In order of likelihood:
- Air in the banjo bolt fittings. The banjo bolt — the hollow bolt that connects the brake line to the master cylinder and caliper — has a tiny internal cavity where air loves to hide. It sits upstream of the standard bleed path. The fix is to crack the banjo bolt itself while holding lever pressure, just as you would a bleed nipple. Have a rag ready — fluid will seep out around the banjo fitting.
- Air in the ABS modulator (see Section 4 above).
- A worn or swollen caliper piston seal that allows micro-movement and creates false sponginess. Pull the caliper, remove the piston, and inspect the seal for swelling or cracking.
- A failing master cylinder piston cup that bypasses internally under pressure. Squeeze the lever hard and hold for 30 seconds. If pressure slowly drops with no external leak, the master cylinder is failing internally.
Motorcycle Brakes Won’t Build Pressure After Bleeding
When motorcycle brakes won’t build pressure after bleeding, you likely have a significant air column somewhere in the system rather than micro-bubbles. This can happen if the reservoir ran dry mid-bleed, if a banjo washer was left out during reassembly, or if a bleed nipple was cracked too far and allowed air ingestion.
Start the reverse syringe method described above. If that does not resolve it, check every banjo connection for the copper or aluminum crush washers — each side of every banjo fitting needs one. A missing washer creates an air leak path that bleeds from the outside every time you build pressure.
How to Get Air Out of Motorcycle Brake Lines: Three Pro Tricks
How to get air out of motorcycle brake lines when standard bleeding fails:
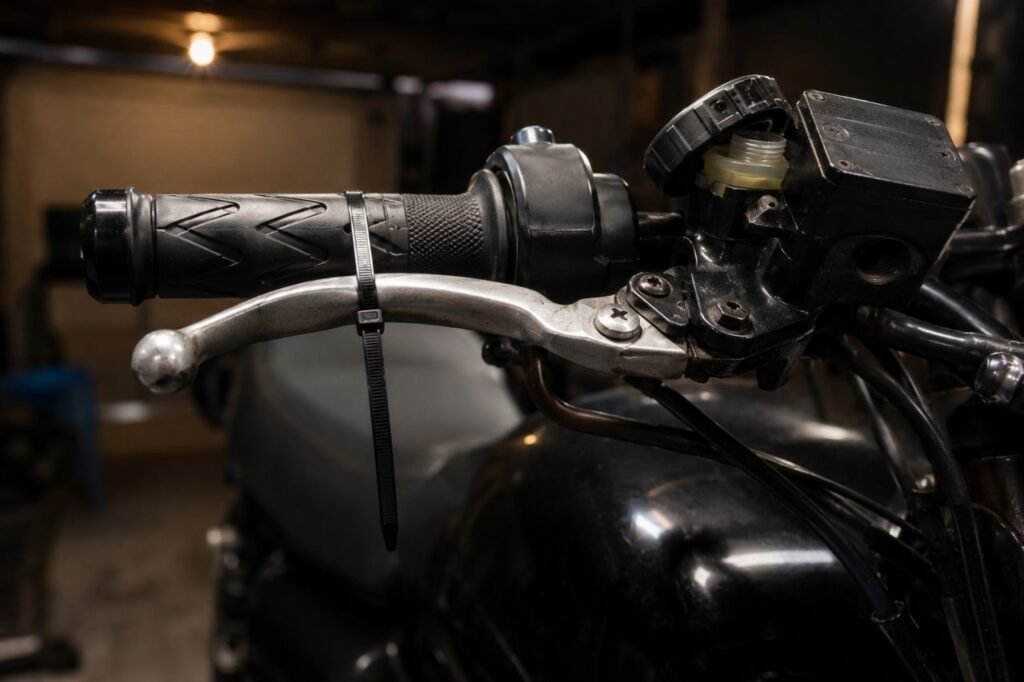
Trick 1 — The Overnight Lever Zip Tie. After your final bleed pass, top the reservoir, refit the cap loosely (do not tighten), and zip tie the front brake lever firmly against the handlebar. Leave it overnight — eight hours minimum. Microscopic bubbles slowly migrate upward through the fluid into the reservoir. In the morning, release the lever, top up the reservoir, do two more bleed passes, and you will often find the lever has transformed from spongy to rock-solid.
Trick 2 — Tap the Lines. While a helper holds lever pressure, use the handle of a screwdriver to tap firmly along the length of the brake line and around the caliper body. The mechanical vibration dislodges micro-bubbles that have adhered to the inner walls of the line or caliper ports. You will often see a burst of small bubbles appear in the bleed tube immediately after tapping a specific spot. Work systematically from caliper to master cylinder.
Trick 3 — Bleed the Banjo at the Master Cylinder. This is the most overlooked bleed point on the entire system. The banjo bolt at the master cylinder sits at the highest point in the brake line circuit on most bikes. Air rises. This is where it collects. Crack this fitting — carefully, with fluid-soaked rags in place — while holding lever pressure, and watch what comes out. On a system that has resisted every other technique, this single step often releases the last trapped bubble and restores a lever that feels like a light switch.
Final Check and Fluid Disposal
After completing how to bleed motorcycle brakes on your bike, pump both levers and pedal firmly five times and hold each one for 10 seconds. There should be zero movement under sustained pressure. The lever and pedal should feel solid and consistent from the very start of travel.
Torque all banjo bolts to 25 Nm (18 ft-lbs) for standard M10 banjo bolts, confirming with your service manual for your specific model. Check both reservoirs are at MAX level, reinstall the diaphragms without trapping air folds, and tighten the reservoir caps snugly.
Dispose of old brake fluid responsibly. It is classified as hazardous waste in most regions. Your local auto parts store or waste facility will accept it. Do not pour it down the drain or into soil — the glycol compounds are toxic to groundwater.
Do this job every two years or whenever you feel that first hint of sponginess. Brake fluid is cheap. Brakes that work exactly when you need them are priceless. Now get your hands dirty.